Breaking the fourth wall

The kitchen wall is no more!  All hail the supersize kitchen!

I annoyed Barry by taking lots of photos as he worked.  In my defence, I did order the Chinese food – I couldn’t exactly get to the kitchen.  It’s difficult to get a photo of the entire kitchen, so I’ve had to take the last two from either side.  It’s that big.

We sat and thought about the list last night; I think we didn’t want to do it because it’s really long and we knew it would be.  To start with, we were going to put the delivery of the kitchen units back because they’re supposed to be coming in less than two weeks’ time.  We’ve changed our minds now, because we’ll only want them, so here goes…

  1. Finish painting in the living room.  We’re going to leave the dining table down for now, and this will allow us to store things in that space.  Namely, kitchen cupboards.
  2. Get the kitchen pipework done.
  3. Electrics – get them where we want them.  Barry will be linking two lights together and getting rid of a switch.
  4. Start patching up the kitchen.  This will involve fitting plasterboard into the holes in the walls and ceilings, and generally making it ready for skimming.
  5. Take the current kitchen out.  Scary step, there’s no coming back from this!
  6. Skim the plaster.  A friend is being called in for this one!
  7. Paint ceiling.
  8. Paint walls.
  9. Put cupboards together (maybe while the other is drying?).
  10. Put in kitchen.
  11. Put in kitchen flooring.
  12. Put in living room flooring.

There are a million and one other things to add, like putting additional radiators in, sorting the photos for the living room wall, getting some more units sorted for the living room, getting the worktops cut, shall we have an island in the kitchen, etc., and I’m sure more will come to me as I’m just about to drop off to sleep.  But it’s a start.

Neither a borrower nor a lender be

My ex-uncle (he used to be married to my dad’s sister) lives about five minutes from our house and loves DIY.  He has any possible conceivable tool, power or standard.  He can advise on plastering, putting up kitchen cupboards, decking, etc., etc.  This gentleman kindly lent his ex-nephew-in-law (can you be an ex-nephew-in-law if we were married after they divorced?) and I his (used) Bosch power sander and a set of stepladders for the various jobs we need to do.

Complicated family politics aside, the sander broke after we’d had it a few hours and so we faced the dilemma: to buy or not to buy the replacement?  Of course, we did, but I really begrudged shelling out £33 on a sander we won’t get to keep and barely got use from.  I’m hoping the stepladders don’t jump out of the car when we’re returning them!

You live and you learn; we will probably just buy a tool next time we need it – at least we’ll get to keep it!  On the plus side, my ex-uncle will be happy and if we do need to borrow something again, he will hopefully be obliging because we’ve been honest.  I say hopefully, because I’m actually telling you before I’m telling him…

On an unrelated note, I thought I’d put up a couple of photos of the kitchen before we do anything to it for posterity’s sake.  Excuse the mess, we’re decorating!

This is the wall (both sides) that will soon be no more.  It holds two radiators, a thermostat, and three light switches that need moving.

There’s a little bay window which would be nice for a table once we’ve got some more space.  The blinds are down because we don’t want people to think we’re complete layabouts without knowing why the kitchen’s in a state!  Not sure where we’re going to put the oven when the wall’s come down, think we can just shuffle it about.

We’re keeping the fridge…

Yes, we had pizza for tea that night…

We’re also keeping the dishwasher and washing machine…

The kitchen is perfectly serviceable and we would probably have kept it for years if we hadn’t have been extending it, but it’s not what we would have chosen ourselves.

Lists, charts and automobiles

We have quite a hefty list of things to do, both in the living room and kitchen, and although it’s scary, we do need to get it down. Then it needs to be put into some semblance of order, and Barry is even contemplating the implementation of a Gantt chart.

While this may sound like an excuse to do anything but the job at hand, there is actually reasoning behind this. For those of you who don’t know, the idea of a Gantt chart is for you to plan what you need to do, when, and by whom, and plot it on a chart. It’s all about following the critical path, and for this, you need to know which jobs depend on other jobs being done. This is the longest the entire project should take, in an ideal world. As a simple example, we clearly can’t put the kitchen in until the plastering has been done, and we can’t plaster the walls until the ones we’re removing have been taken down. You get the idea.

It’s just a little tool to set us on track and give us a plan for each DIY day. Ours would be based on weekends only, but if Barry decided to take time off work, or we decided to spend a few evenings working on it, the schedule could be altered. Perhaps one undertaking may take longer than we thought. It also also allows you to see what jobs can be done that don’t depend on other tasks. For example, although I can’t take down a wall or move electrics, I can do paint touch-ups, clean or sand walls, fill holes with plaster, etc. I’m also not too shabby wielding a screwdriver. Drills are beyond me though!

On another note, we’ve been looking at some fabulous vertical radiators for beside the dryer in the kitchen/bottom of the stairs, shown here, but can’t decide on a colour at the moment.  Wickes have a nice range, but we may end up on eBay.  It’s a good use of the space, because we’re actually losing the only three radiators in that part of the house by losing the walls.  We’re also considering heated flooring (although slippers are cheaper!).  As we’ll be able to fit a table and chairs in the kitchen when we’re done, we will hopefully be spending more time in there, so it would be worthwhile.

Barry’s now blocked off the toilet and sink, although we had several comments from friends and family about the open plan loo (pictured right).

He’s sealed the drains with a nylon expanding plug, silicone, and expanding foam.  He did notice a full length of copper pipe down the drain, so God only knows what else is down there; no wonder we had problems!

Pictured below are the spots where they were, RIP little toilet and sink.  Show some respect; a moment’s silence please.


Ode to an oven (and a half)

As uncouth as it is to love inanimate objects, I love my oven. And a half.

Gazing at it proudly with my husband, we dream of the culinary delights it will surely produce. What starters we shall master! Our friends shall be in awe of our delicious creations! Pies, puddings, and pre-packaged meals await…

Only first we have to actually install the kitchen.

I was going to leave it there, but can’t resist showing the progress – Barry managed to take down the other bathroom wall last night.

20120129-205444.jpg

20120129-205828.jpg

One wall down

While I was touching up the living room paint today (not nearly as steady hand as I thought I had!), Barry was busy taking down one of the bathroom walls.  Definitely not supporting walls, thank goodness!

I wasn’t quite quick enough to take a before shot, so the crafty bugger had managed to get the door off and the frame out by the time I took this.

The photos below were taken (in between me painting), showing how he’s taken the wall down.  He still needs to get some bits to block it and the sink off, but that should be this week.


Et voilà!  It looks like one of those fake bathrooms in a shop where they only have three walls!  I think we’re committed now.


Shades of grey

It’s difficult when we haven’t finished the living room, but are trying to get cracking with the kitchen as we’re under a bit of pressure as they’ve delivered the oven yesterday and are trying to deliver the units in two weeks.  We still have ideas that we’re working on in the meantime for the living room, but they’re having to go on the back burner for a little while.

One idea we had was of having lots of photos across the green wall in the living room, under the spotlights.  We liked the thought of having loads of images of friends and family, although I initially thought more order would be better.  I’ve since been convinced that orientation and size doesn’t matter.  I will put my foot down and say I want all the same frames though, to stop it looking too unruly.  White wooden ones!

This idea then developed into a black and white theme. As white wood complements our new décor, I started thinking about how the photos would look inside the frames.  I’ve spent my lunchtimes at work using Illustrator to turn colour images greyscale and I now have 37 to print!  The selection may require some editing down and we’d need to decide which ones we wanted larger than others.

I didn’t want to put someone’s image up without asking, so this is one of me taken in the Maldives on our honeymoon five years ago.  Not all of them are quite as artsy, but it gives you a feel for how it will look.

If anyone has any suggestions where one may procure dozens of reasonable wall frames, ranging from A4 down to standard photo sizes, please let me know!  I’m willing to paint them, but I would like them all to look the same style.

Taking down walls, breaking down barriers

As a non-DIY expert, I think taking down walls sounds like a really scary thing to do.  While I have full confidence in my husband’s ability to knock on walls and nod, much like Alan Carr in the Location, Location, Location mashup, it’s terrifying to think that one little mistake could mean a spare room coming down into the kitchen.  We could pretend we lived in a studio, I suppose.

Knocking on the living room ceiling and drilling holes into it to fit the spotlights revealed that the joists run a certain way – on the floor plan shown here (which is actually a mirror image of ours, but the only one I could find), they run left to right, and I’ve indicated the walls we’re planning on taking down.

The builder didn’t comment when he came round to quote, so I think that means he was in agreement that they’re not supporting walls.

There is a lot to consider.  These three walls contain quite a few items to move, including plug sockets, light switches, the house’s thermostat and two radiators.  A third radiator needs to be moved from beside the loo.  Everything then needs plastering.  It’s not a small undertaking.

I’ve been advised by Barry (I’ve been told I can now provide my husband’s name, which makes life easier!) that electricity wires are, in theory, put in in straight lines.  That should make moving the switches easier.  Radiators are completely beyond me, but I’ve been told that the pipes come from above, not below, if that means anything to anyone.  I’ll try and get some before shots shortly, but the loo’s currently a holding area for all of the stuff from the living room!  It’s like living in one of those puzzles at the minute where you can only move one bit at a time.

The first thing to tackle in this whole thing is blocking off the sink and toilet.  By removing them, it will give Barry more room to manoeuvre to get the walls surrounding them down.  I’m just thinking about the fluffy towels we’ll have when we can fit a tumble dryer in the kitchen rather than hanging them on chairs or radiators to dry.  Crispy!

If you can’t stand the heat

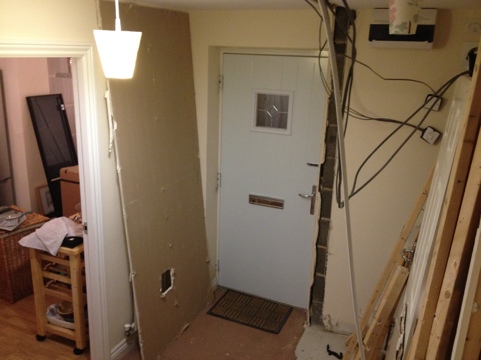
Following my mother-in-law’s suggestion, we decided to look into knocking down walls to make our kitchen a larger room.  We think (and so do many of our friends, now we’ve discussed it!) that it’s really small for a house this size.  However, we know we’ll be knocking money off our property by getting rid of a room, albeit a smelly hole.

We did have a builder round to quote for knocking walls down, installing a new kitchen (plus installing fitted wardrobes in our room, but that’s definitely going to have to wait), but the prices were more than we’re willing to pay, so the husband is going to do it all himself, with a little help from the tea fairy (me).

We went to B&Q before making a decision, and vaguely had an idea of high gloss white units in mind.  We were still at the stage where we were testing the water and weren’t really committing to anything, but as soon as we saw this, we knew we had to have it!  The kitchen is from B&Q’s Cooke and Lewis range (as is the photo).

We made an appointment and then a few weeks later sat for an hour having the kitchen designed, with the added benefit of it being on sale as it was January.  If you get installation, they do make you change all of your electricity points (“to ensure they’re safe”, never mind we’re in a new build) and the cost for installation alone was a whopping £3,600, but we looked past that to supply only, which was much more manageable (and they were offering 3 years 0% finance).

Then madness gave way to reason and we realised we’d better get another quote from somewhere to make sure it really was reasonable and we hadn’t lost our senses.  We went to Wickes to get a quote from lovely Malcolm, who quoted us on the Caledonia.  It’s an inoffensive plain white high gloss unit, with integrated handles which I’m not too keen on anyway, but would have lived with if it was the difference of, say, £2k.  It wasn’t.  And my cleaner mother reliably informs me that integrated handles are a nightmare to clean anyway.  Sorry, Malcolm.

I’d also like to point out here that I double checked MSE about B&Q’s units and prices before we sold our souls and there were good reports, but also some scathing ones about the price of their installation.  My guess is that it’s something they don’t really care to get involved in, so they make it worth their while for the times they do.  As a side note, Martin Lewis’ website is brilliant, and I always check it before buying anything major.

So, the husband trotted back to the B&Q designer with our full page of tweaks for another hour of kitchen creation (measurements were slightly off, we wanted white, not cream, a bigger sink and oven, to name but a few changes).

Ah, the oven.  It deserves a post all of its own.  In fact, it’s not just an oven.  It’s an oven and a half.  My mum actually counted the number of knobs on the front from the picture and told me what each of the ten might be for.  Seriously.

B&Q price-matched Wickes and even managed to squeeze in a cheeky wine rack, and I’m really glad they did (price-match, that is) because the colour combo units make me much happier than plain white.  Granted, we were going to tart the white ones up with a flash of colour from a fuschia upstand, but it’s not the same you understand.

The husband called me to ask if we were going for it; B&Q gave him 20 minutes to make his mind up.  I didn’t really need the 20 but ummed and ahed along until we came to an agreeable conclusion.

This was a week last Wednesday.  On the Thursday, he got a call from Indesit asking if they could deliver our new oven on Saturday, very eager.  He managed to put them off a week, but couldn’t delay it any longer, so we’re going to have a random oven until the walls are sorted, the old kitchen is out, the new kitchen is in and we can get a registered gas man to fit it.  The joys of self installation!

And the Lord said go forth and multiply your lights

Or something like that.

My husband seems to have harboured a heretofore unrealised passion for lights.  Our living room previously had two ceiling lights – one over the living area, and one over the dining area.  We now have 13.  I’m not kidding.

As mentioned previously, I fell in love with the Argos lights which we’ve built our room around, and this involved changing a single chandelier-style light to two of those instead, leaving a giant hole gouged in our ceiling.

We replaced our huge red light over the living area with a Belize light from Argos, which is a lot more discreet, and will make guests feel a little less like they’re being questioned when it’s on.

Then the husband decided that he’d quite like spotlights across the back wall.  We went for these inoffensive ones from Wickes, and initially he only wanted to have five or six, but I convinced him he really meant all ten.  As it turned out, joists run across where he was drilling, and he ended up having to drill holes in between every light he put in just so he could carve a notch to hide the wiring.

We spent a weekend plastering these holes, and all of the other various dents in the walls that we hadn’t noticed until now, and I got a brief lesson in grit size of sandpaper.  That may or not have been when I took the Reader’s Digest DIY Manual to bed.

Anyway, we’ve now got the bulk of the painting done, just the edges to tidy up, and we’re pleased as punch with our choices so far.

While all this was going on, we decided to have a mosey on down to B&Q and see what the kitchen situation was.  Over Christmas, we were telling my mother-in-law how we can’t use the downstairs loo as it emits a terrible smell.  Actually, it does that whether we’ve used it or next-door-but-one uses it, I think the pipes haven’t got enough of an angle to clear the waste.  Our house is over three floors, and we currently have a toilet on each floor, but our guests are asked to use the one on the middle floor anyway, due to the building problem (yes, we complained, as have our neighbours; they cleared them once but it’s recurring and we’re wasting our breath).  She made a passing suggestion for us to knock down the walls around the loo, as well as one of the kitchen walls, to make a giant kitchen!

I’ll post separately about the kitchen situation, but the long and short of it is that we’ve bought one, but decided to fit flooring in the living room after we’ve fitted the kitchen so that it doesn’t get wrecked.  RIP to the cream living room carpet, by the way, which now looks like it’s been attacked by paint.

I’ve fallen in love with this first white flooring by Quickstep, called Elina Wenge Passionata.  I’ve seen varying prices between £11 odd and £30 per square metre, and at 24m2, plus all the extras, it’s quite expensive (to us).  Cheapest we saw it at was NCS Flooring.

Ever practical, my husband ordered samples of a similar (but not the same!) flooring, which is Quickstep Girona white chestnut.  It’s got more of a grey tinge, which doesn’t offend me as the walls are grey, but I think the white would have lifted the room more.  We’ll have to see, but I think we’ll have to go with this as it’s almost half the price!

Paint, glorious paint

Around the lights we’d chosen, as I mentioned previously, we thought we’d go for a classic feel in the living room. We chose this beautiful green quite quickly (Wickes’ Boudoir), and after slathering the wall with three shades of grey from tester pots, chose the palest (Nickel). The green is a chalky flat matt, which works really well – it makes it look quite grown up!

We discussed, Googled, and then discussed some more which wall we should make the feature wall and how to ensure the room wasn’t too dark with having vast expanses of grey walls. We’ve counteracted this by choosing a pale grey, sorting lots of lighting, and we’ve decided to go for a white wood laminate floor rather than the dark wood we’d originally wanted.

The ceiling was painted last Saturday by the husband. Painting a white ceiling white is the most unsatisfying feeling ever (or so he tells me); you can barely see where you’ve painted. I spent my time feeding him and wandering round looking at the ceiling, pointing out bits he’d missed. And then got shouted at for “making it up”. I wasn’t.