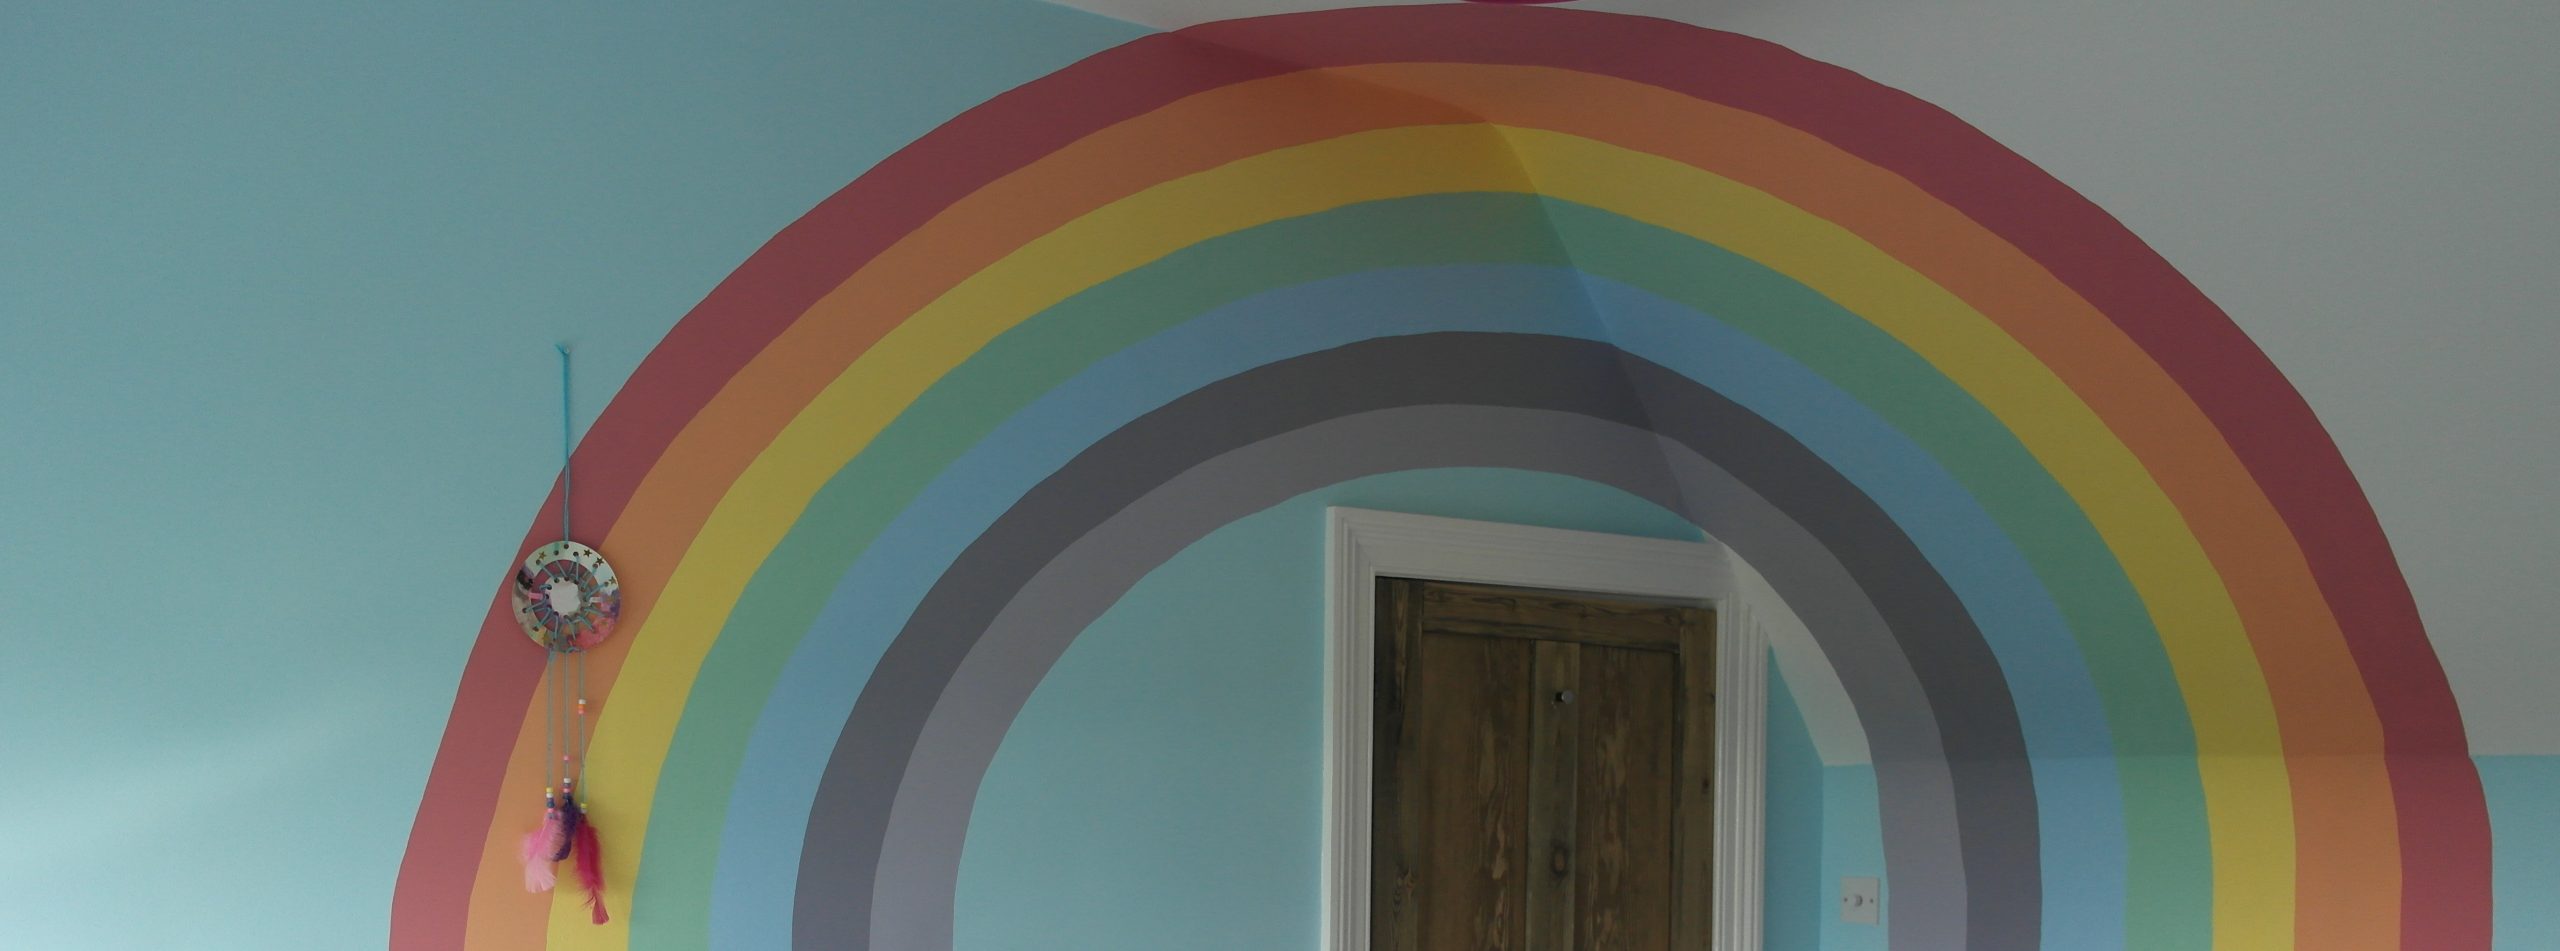
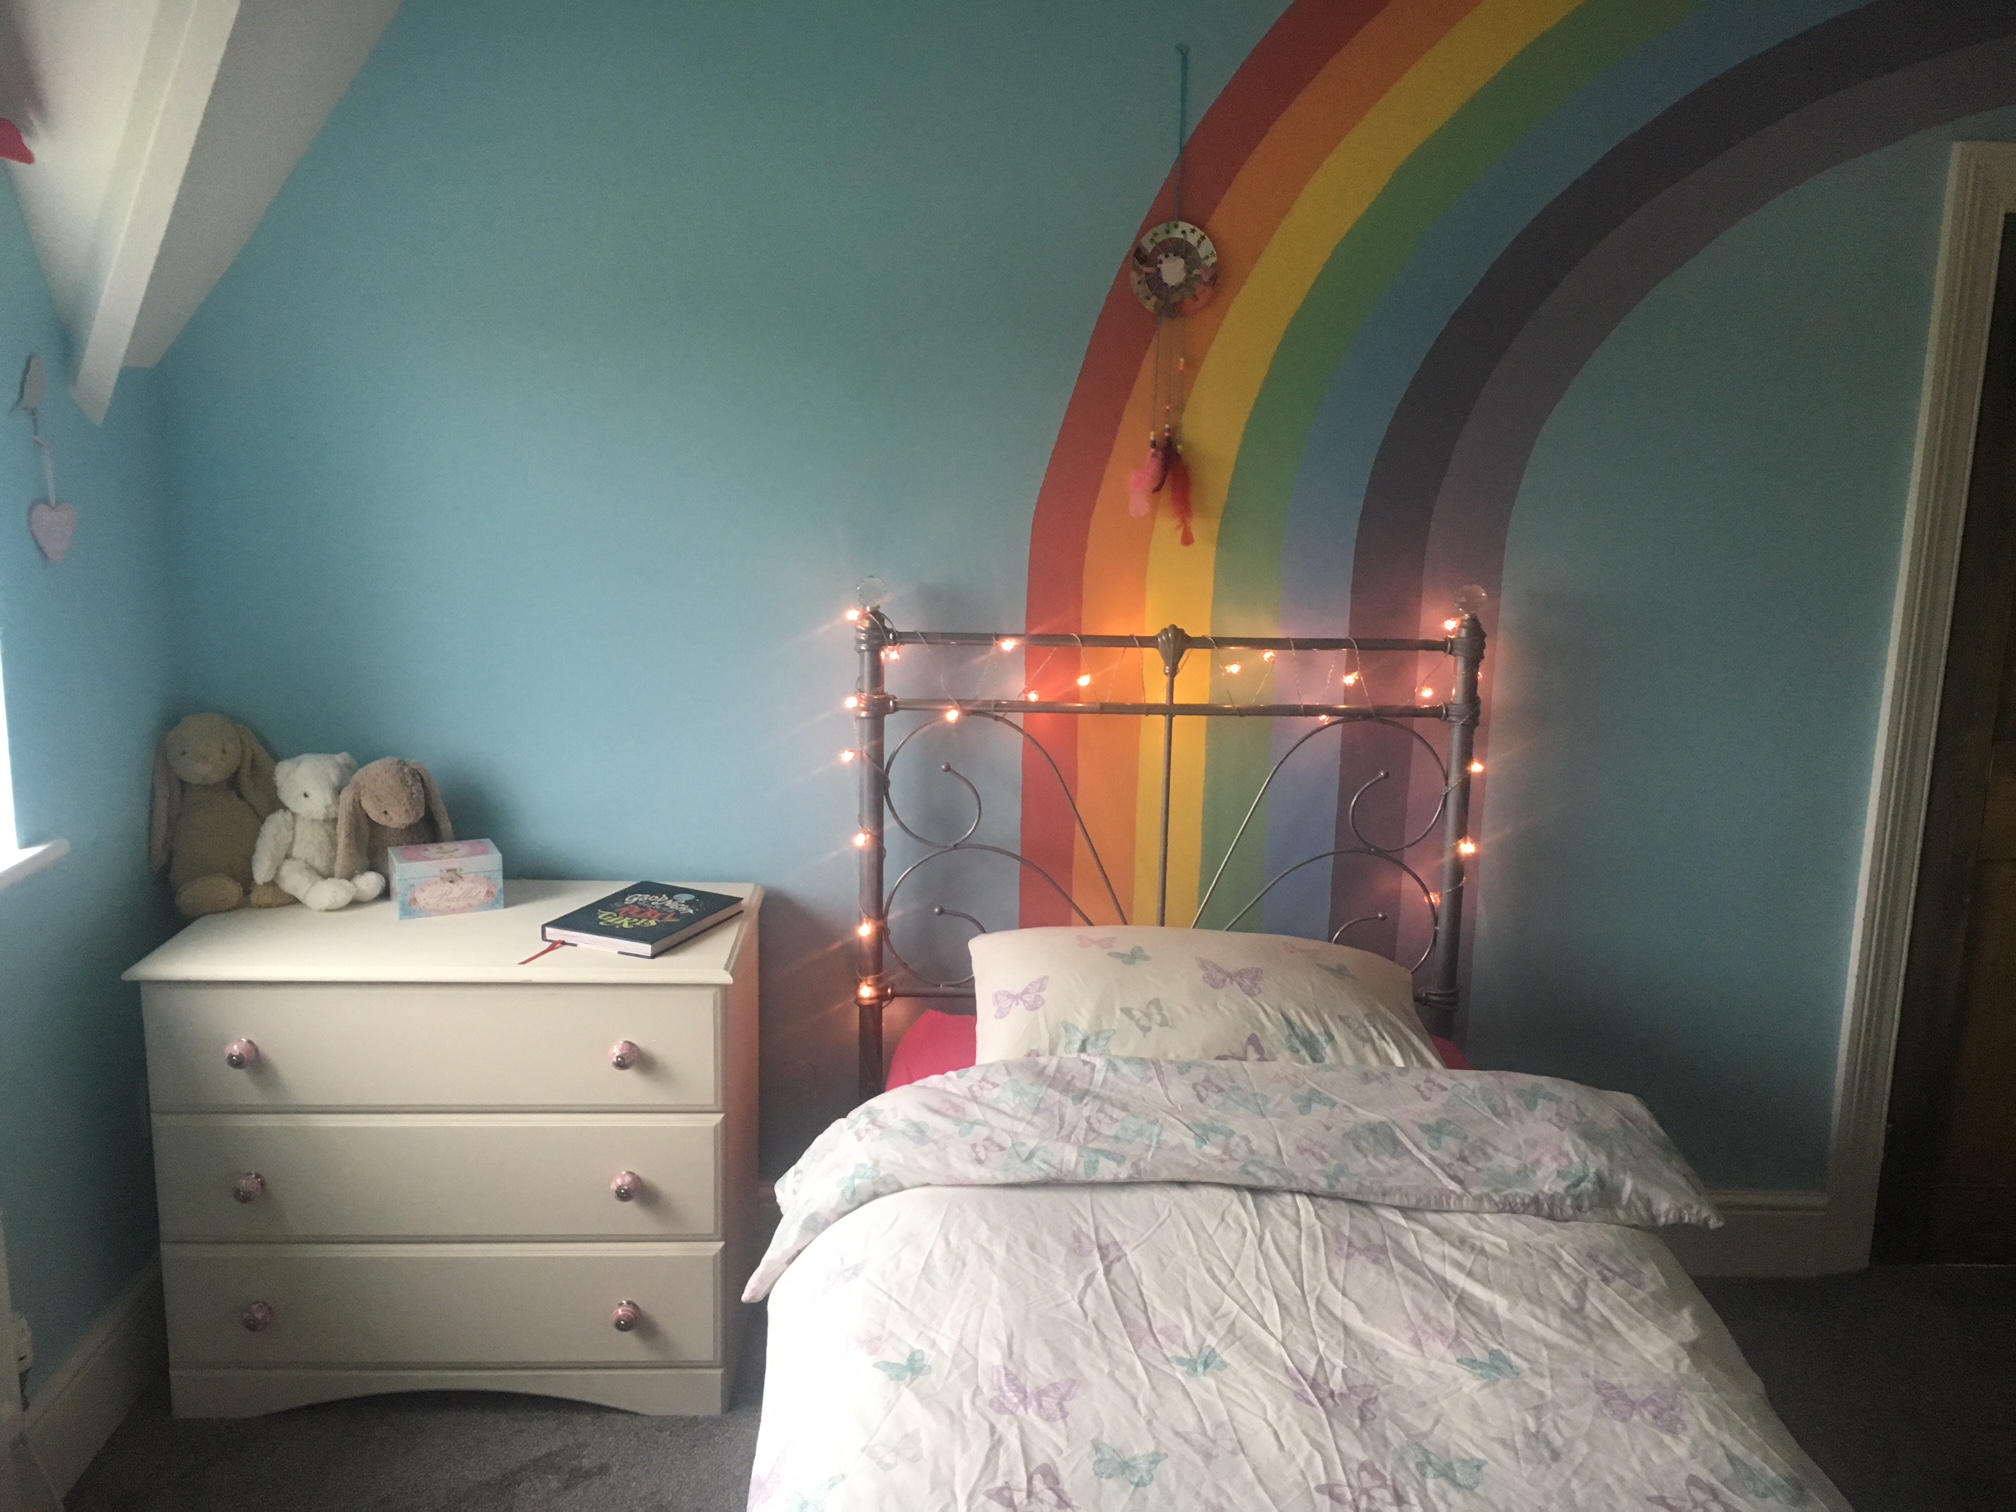
I’m writing this one as I found no help online to achieve this – I wanted to paint a rainbow in Scarlett’s room that started on one wall, travelled over her door onto the ceiling, came down an eaved part of the ceiling, and then came down the adjacent wall.
I get these ideas in my head sometimes that I can’t get out. Things that aren’t actually that practical or even feasible, but I want to do them anyway because I think they’ll be amazing if they work. SPOILER ALERT: this worked. It’s in the header image right there.
 There’s a few things you’ll need to achieve this.
- A bucketload of patience. This is not a quick thing to do, but there’s no rushing it. Most of it is waiting for paint to dry.
- A projector. I’ll get to this, but no, a piece of string isn’t going to cut it if you’re drawing across different surfaces.
- A steady hand. Tape will not help you here, you have to do it all freehand.
How this rainbow began
Let’s rewind. Scarlett stuck these foam stickers onto the wall with what I can only assume was Gorilla Glue. Wonderful. As it happens, her room hadn’t been painted since we moved in, so… hey, it’s time to paint (for those of you invested in the sticker situation, they eventually came off with a Stanley knife and mouse sander combo and are no longer welcome in my home).
Not sure what I was thinking when I asked my five-year-old what colour she wanted her room. In no world was there ever going to be any other answer than “rainbow”. My first thought was to paint it blue and get some stickers for the wall, but we’ve been down the sticker path before and they always end up peeling slightly, and I imagine that’s exacerbated by kids picking at them. Plus, and here’s the kicker… once I started looking at inspiration pics on Pinterest, I started thinking bigger… and bigger. The more I thought about it, the more I wanted the rainbow to actually be massive. She wanted a rainbow room? She’ll get one.
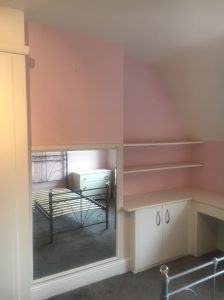
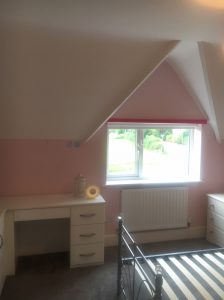
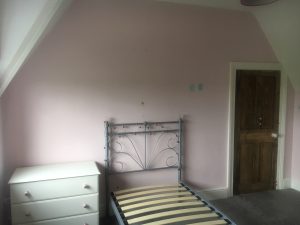
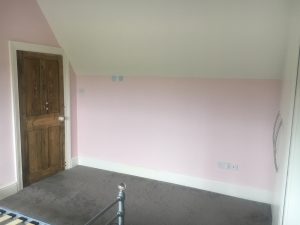
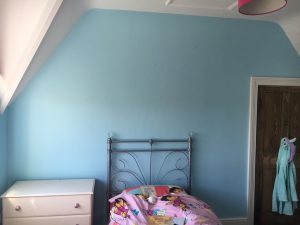
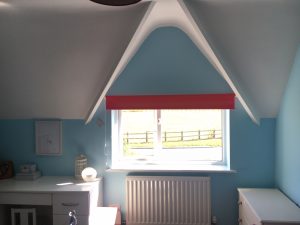
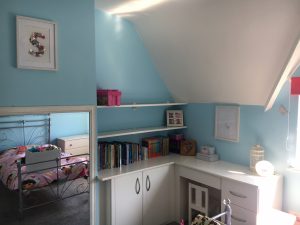
This is her room just before I started painting. A really sweet pink on all walls, and she has a ceiling that has eaves coming down either side of the room.
The logistics of painting a rainbow
I’d decided where I wanted the rainbow to fall (from her bed, over the door to the adjacent wall) – the next thing was the HOW. My first thought was to get a piece of string and tack it to the skirting board with a pencil attached and just keep shortening it to get the stripes. Um, no. That won’t work if you’re going over walls of different angles, so it will work for the first one and then you would need to find a different point for the arc the next surface. I suspected the stripes would need to get wider on the ceiling to keep it looking like a true arc from the other side of the room and just couldn’t get my head round it.
I put a shout out on social media for maths help… but as one friend said, this would take a combination of pi, Pythagoras and trigonometry and still might not look right. What I needed was a projector.
Of course! A friend’s dad immediately offered to lend us one, which was brilliant – you really can’t do this without one.
Choosing a base colour
We have a B&Q near us that does Valspar paint, which I love because there’s so many colour options. I wanted a blue that looked like a perfect sky. We tried out a few blues before Scarlett and Barry agreed on one (I wanted to go darker but they’re scaredy cats) called Forever Blue (but if you’re thinking of doing this, go for Sailing on the Bay, it would have looked great).
I love a matt finish, so I got that for all of these colours. It just looks more expensive to me (it’s not!), Valspar’s is equally scrubbable as their silk version and if you live in an older house like ours, I find it helps hide the lumps and bumps that come with it, whereas silk can sometimes highlight imperfections. This is all by the by, personal opinion and all that.
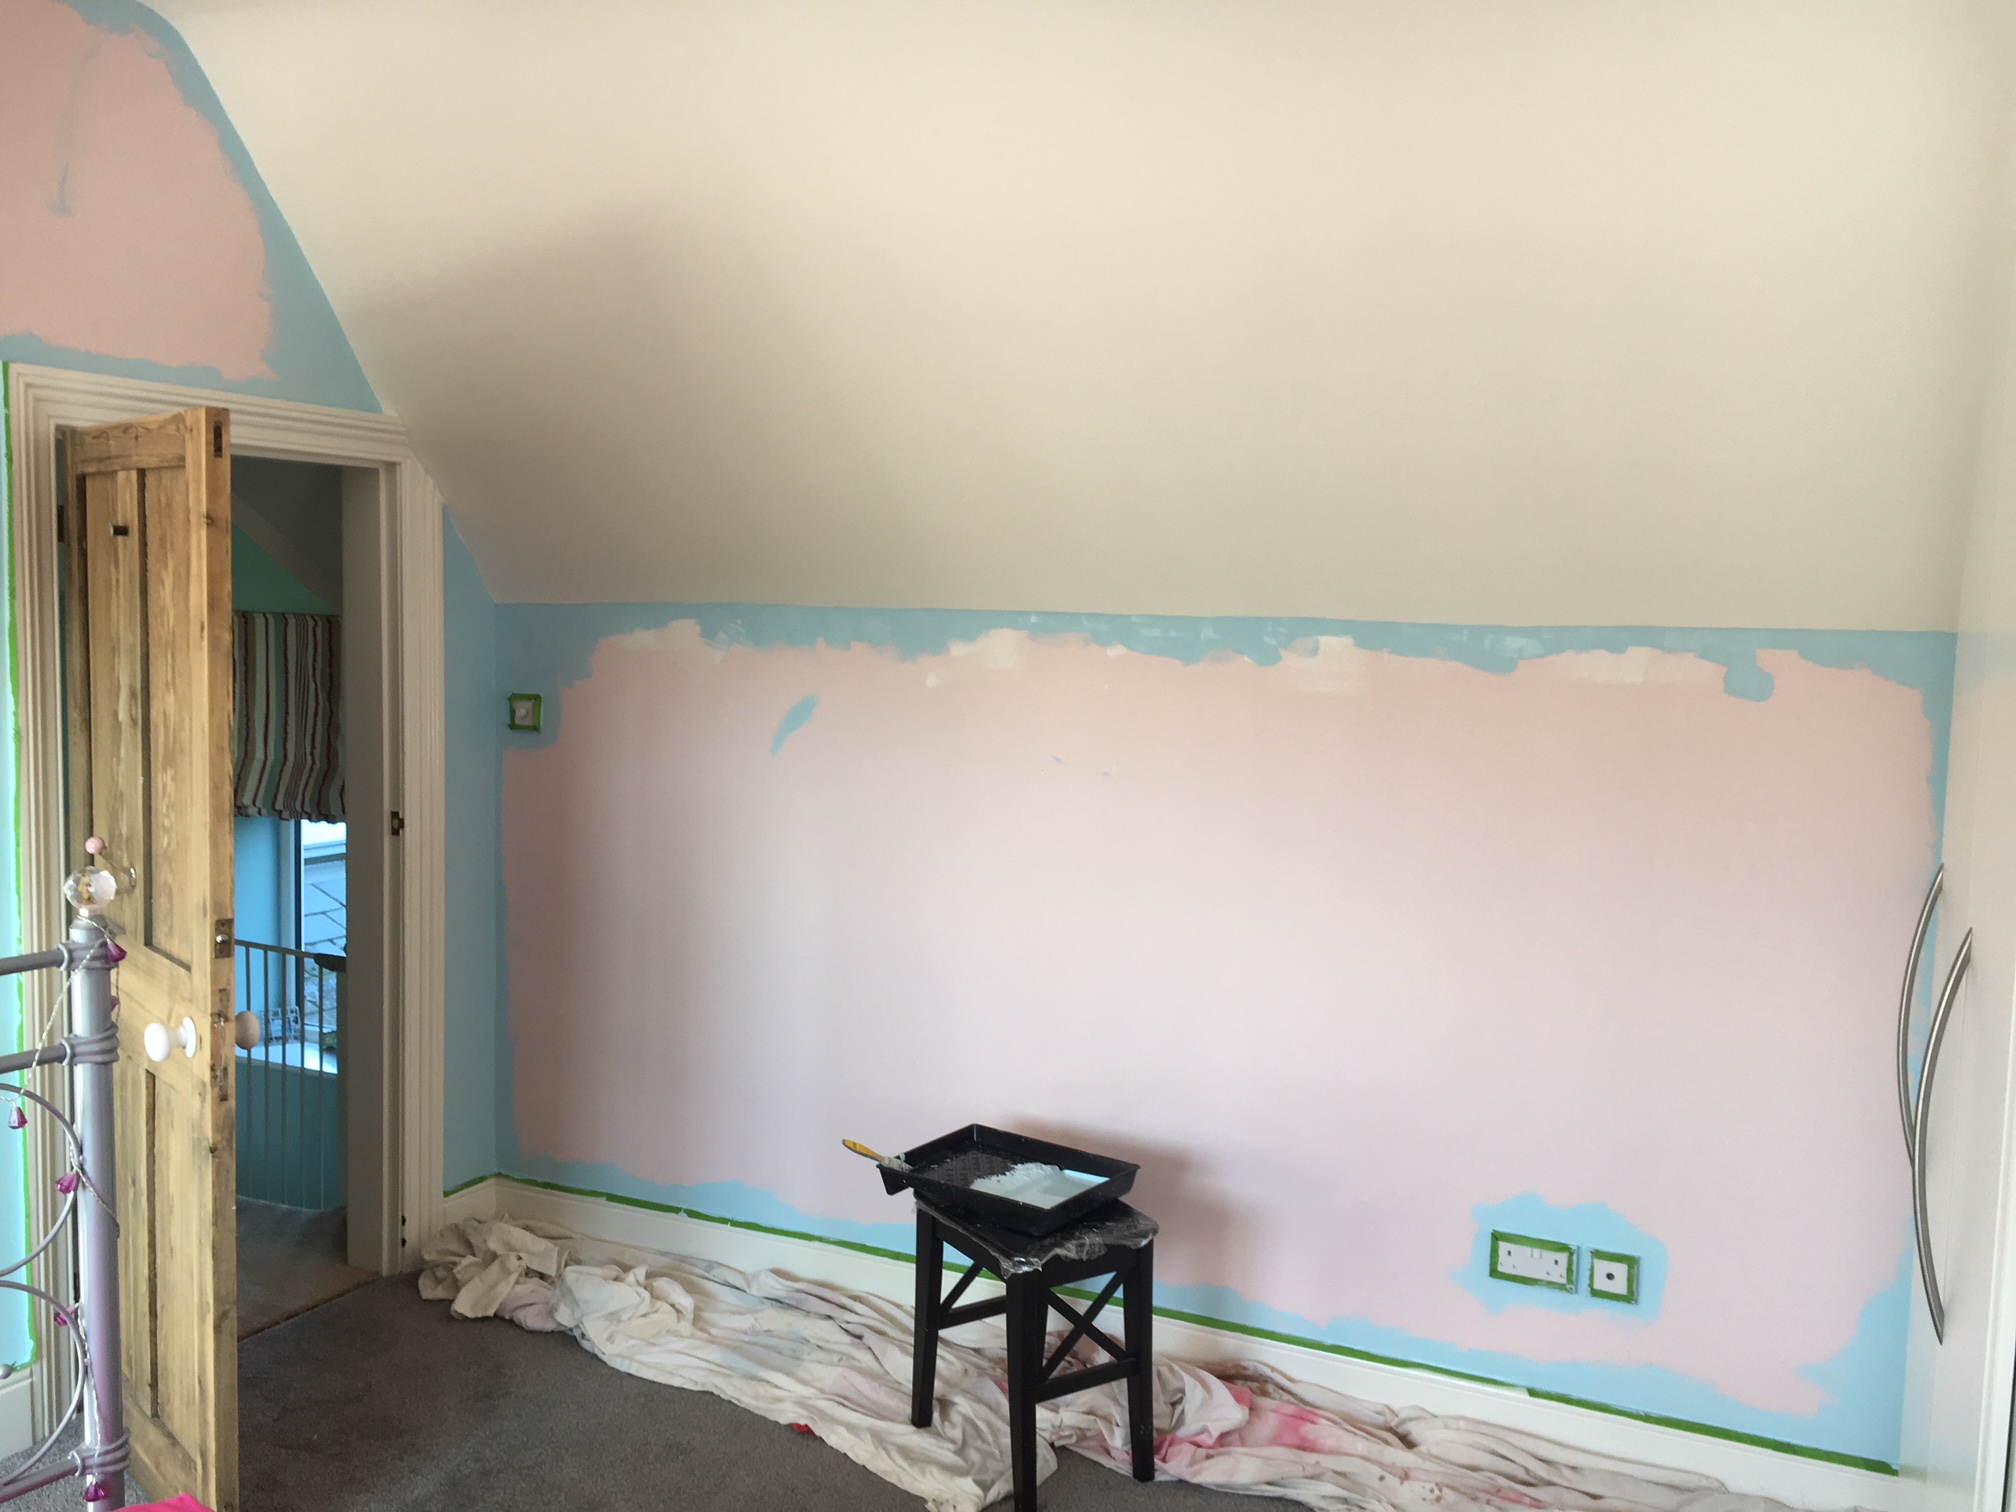
 Because we had the projector for a limited time, I initially only painted the ceiling and wall where the rainbow would go, so that I could mark out the rainbow lines and then hand it back.
I wouldn’t skip this step. I know it’s really tempting to paint around where the rainbow would go, or even try and paint around it once it’s done, but this gives it an even base (white would have been much better though), and it means you’re not trying to paint around your hard work after the fact.
Projecting the rainbow
 This was more faff than I thought. The projector we borrowed had no zoom function, so the largest picture I could get was based on how far back I could get the projector in the bedroom.
If you download a standard rainbow image that you find on Google, as I did, it’s possible it might not fit the surface you’re trying to cross.
I spent ages turning the projector on and off, waiting for it to cool so the bulb didn’t get damaged, then moving it and trying again. No dice.
After spending an evening just getting frustrated and not seeing how it would work, I slept on it and just decided to go ahead and draw it out. What’s another layer of paint if it didn’t work?
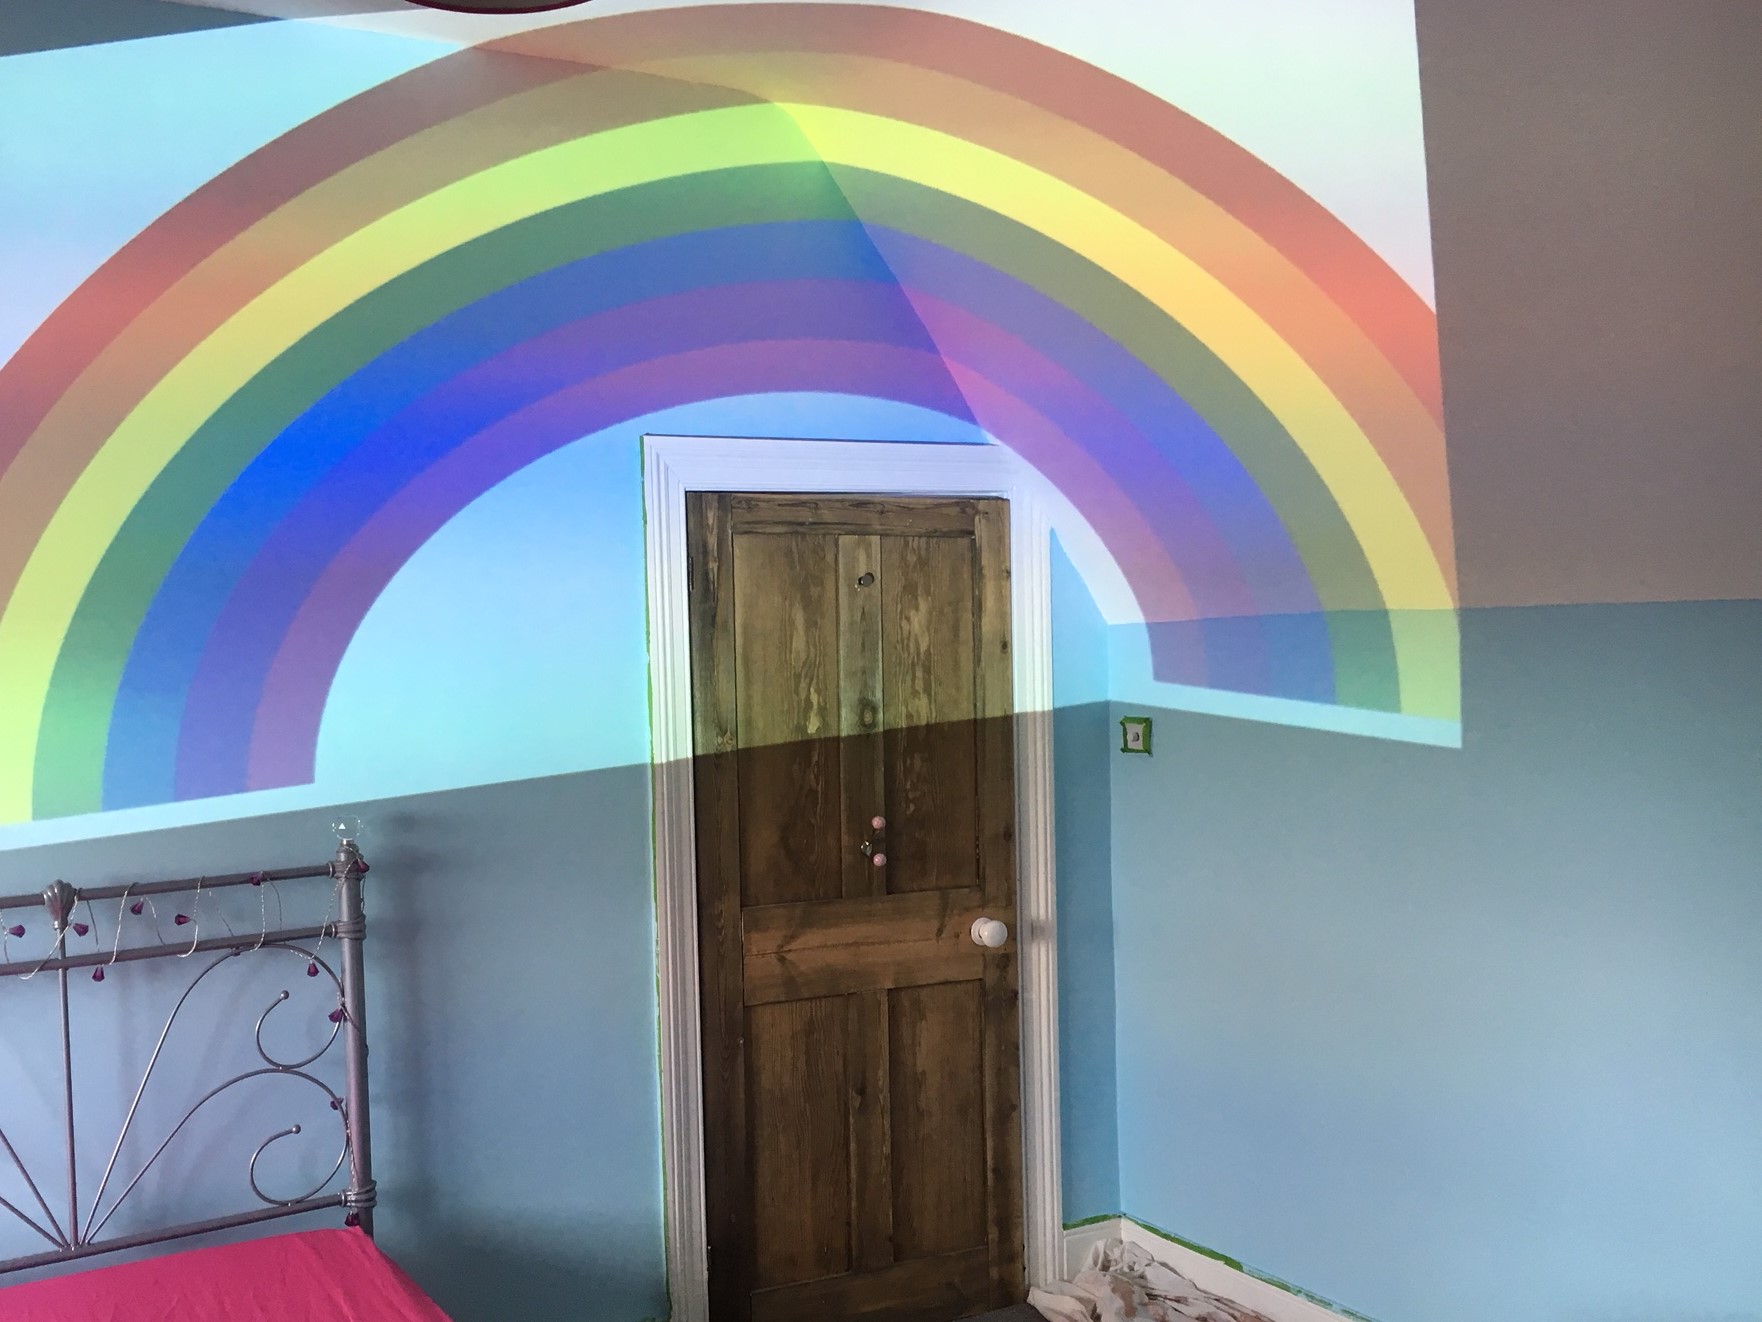
 I eventually found joy in adjusting the image I had on my laptop, stretching it wider to arc over the door. It’s not as wide as I’d envisaged originally – I’d wanted it to go right over to the other side of the right hand wall – but it worked well and still started at her bed.
If you have a projector that can fit the space you’re aiming for though, absolutely do that, it would have made life much easier!
I found a soft pencil (4B, if you’re interested), and started tracing all of the lines onto the walls and ceiling.
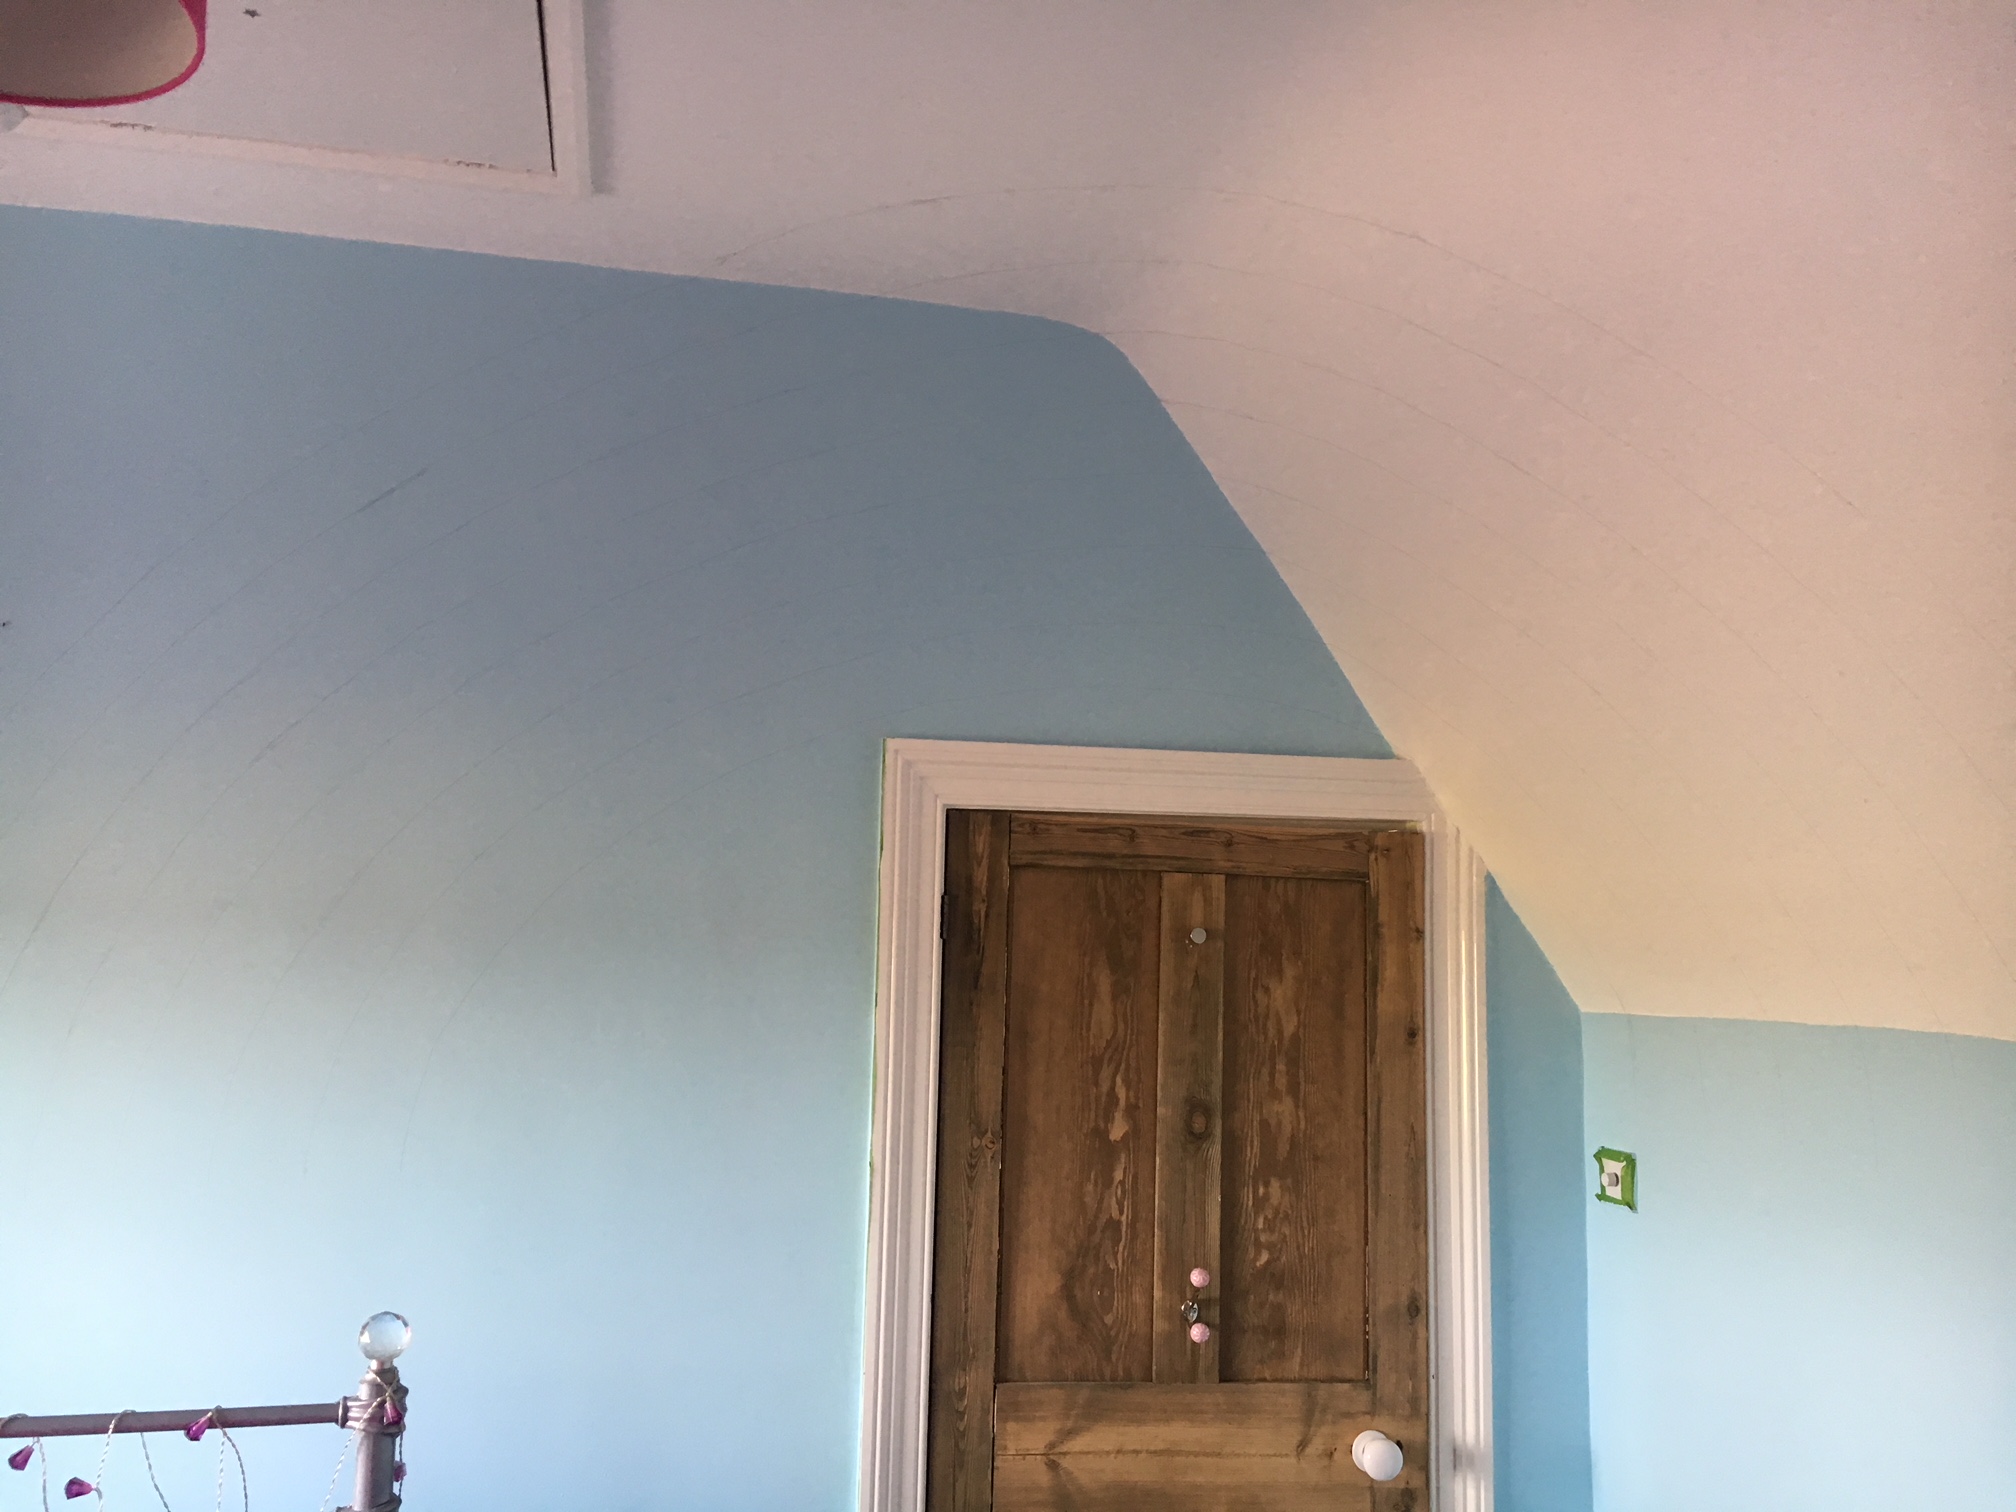 Once they were all traced, I turned the projector off, carried the curve on a little at each end until it felt like a sensible place to drop straight down, and then used a metre spirit level as a ruler to drop the lines straight down.
This made it really obvious that the string method would never have worked. The lines were all over the place, curving round the ceiling.
Choosing the rainbow colours
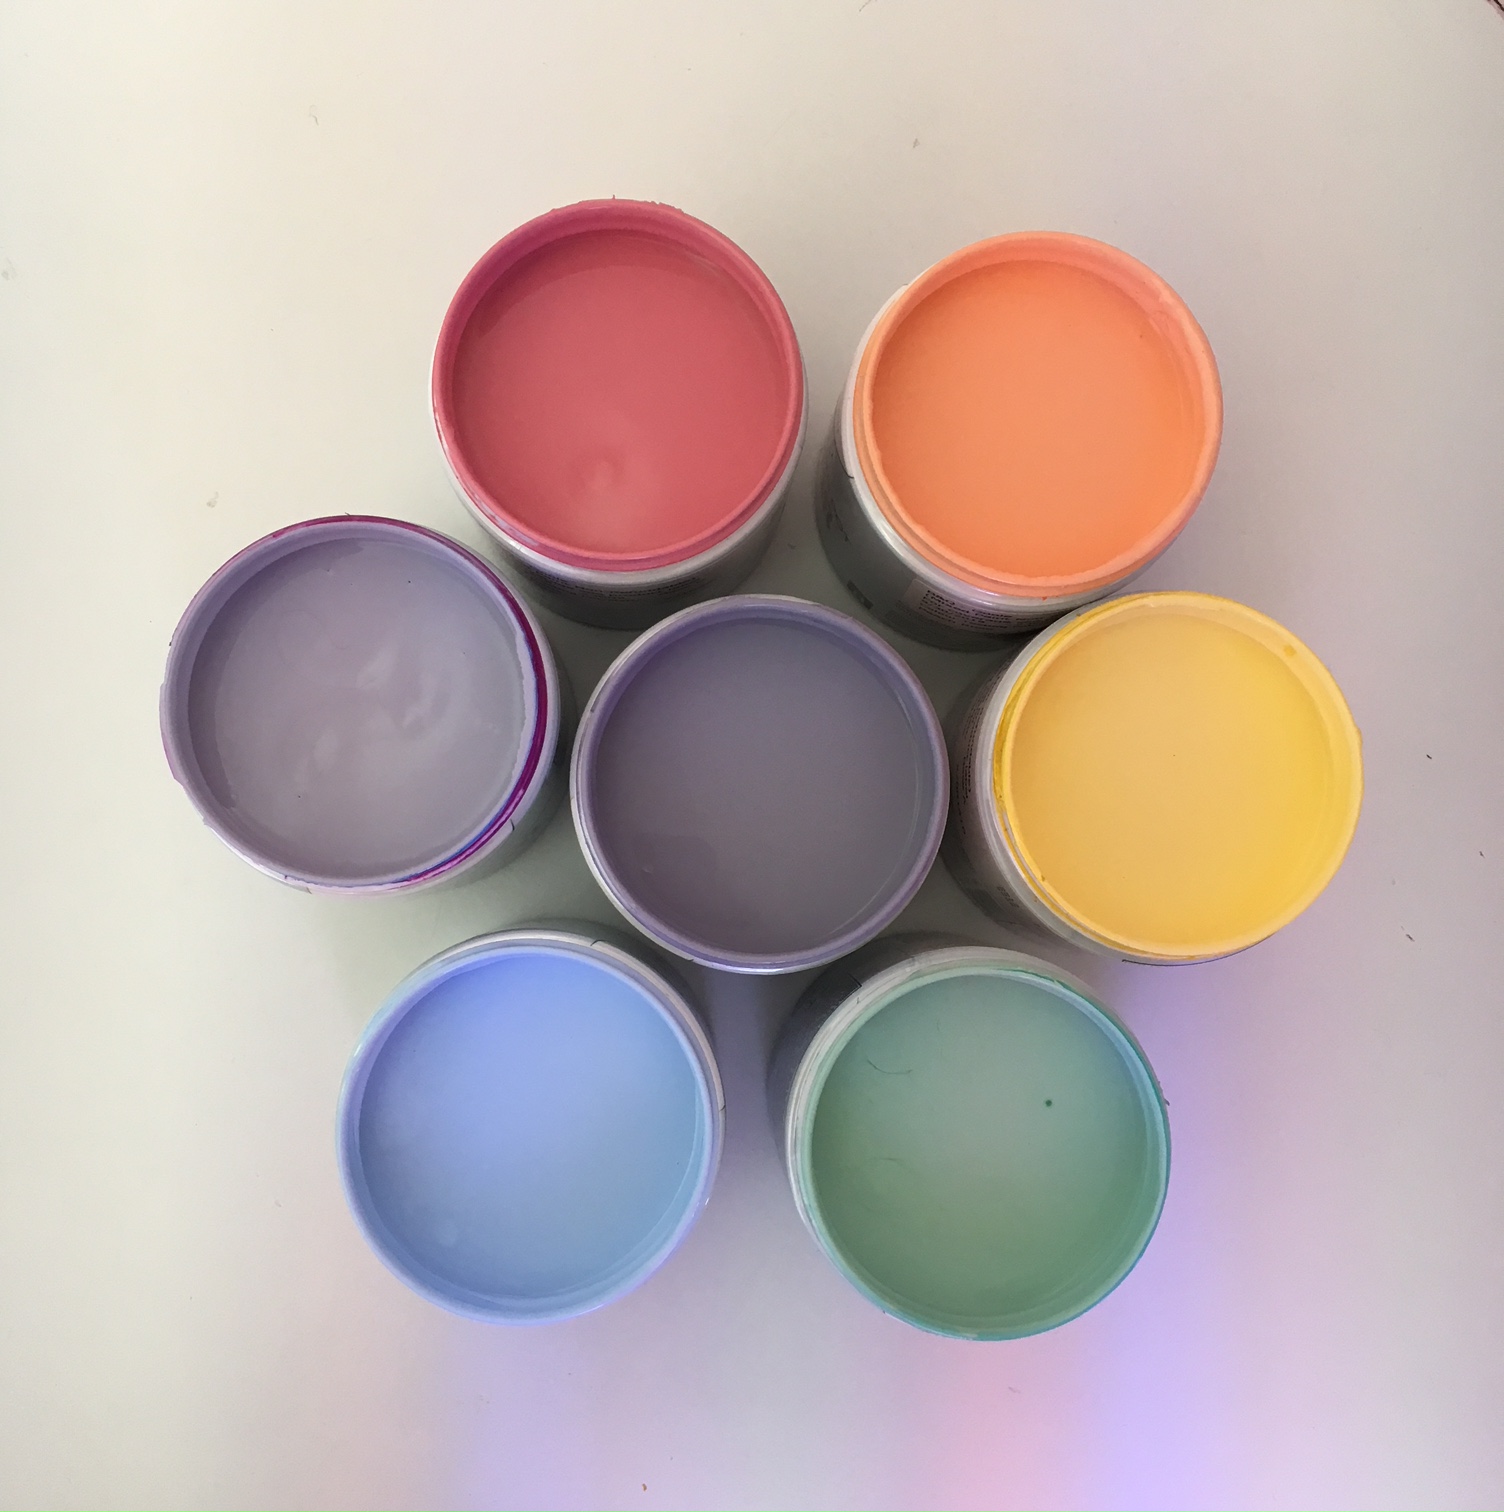
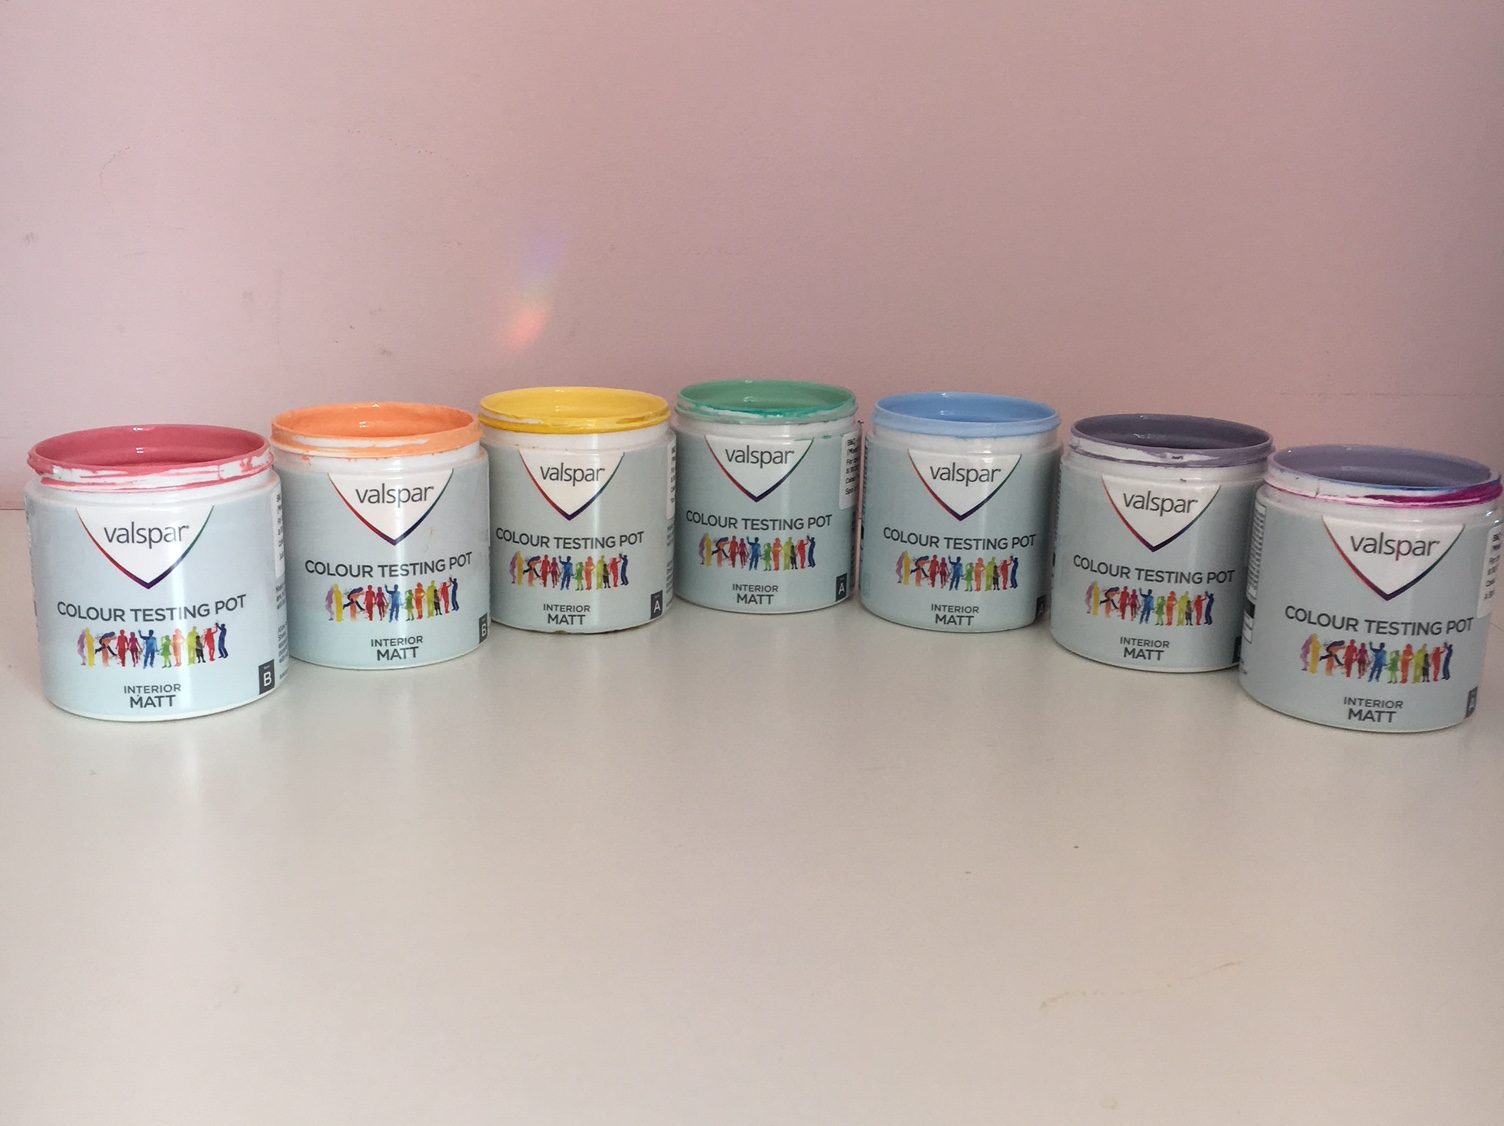 While I was at the Valspar counter picking up the blue paint testers, I chose a handful of sample cards for the rainbow colours I wanted. I knew I didn’t want full on brights as I still wanted her bedroom to be a calm space, so I went for toned down versions. Not quite pastels, but definitely not the standard rainbow shades.
Some solely based on name alone, I went for… Juicy Ruby, Peach Rose, You Are My Sunshine (which is what I used in Jude’s room as well), Spin A Yarn, December Solstice, Kindness, and A Stitch in Time.
Painting the room
Projector returned, we could get on with painting the rest of the room, which Barry did in one day, WITH Jude. What a trooper. I wish it could stay this neat forever.
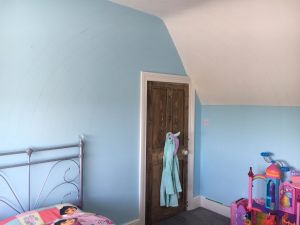
Painting the rest of the room at this stage meant that there’d be no accidental splatter on the rainbow mural which in hindsight would definitely have caused tears.
The scary bit
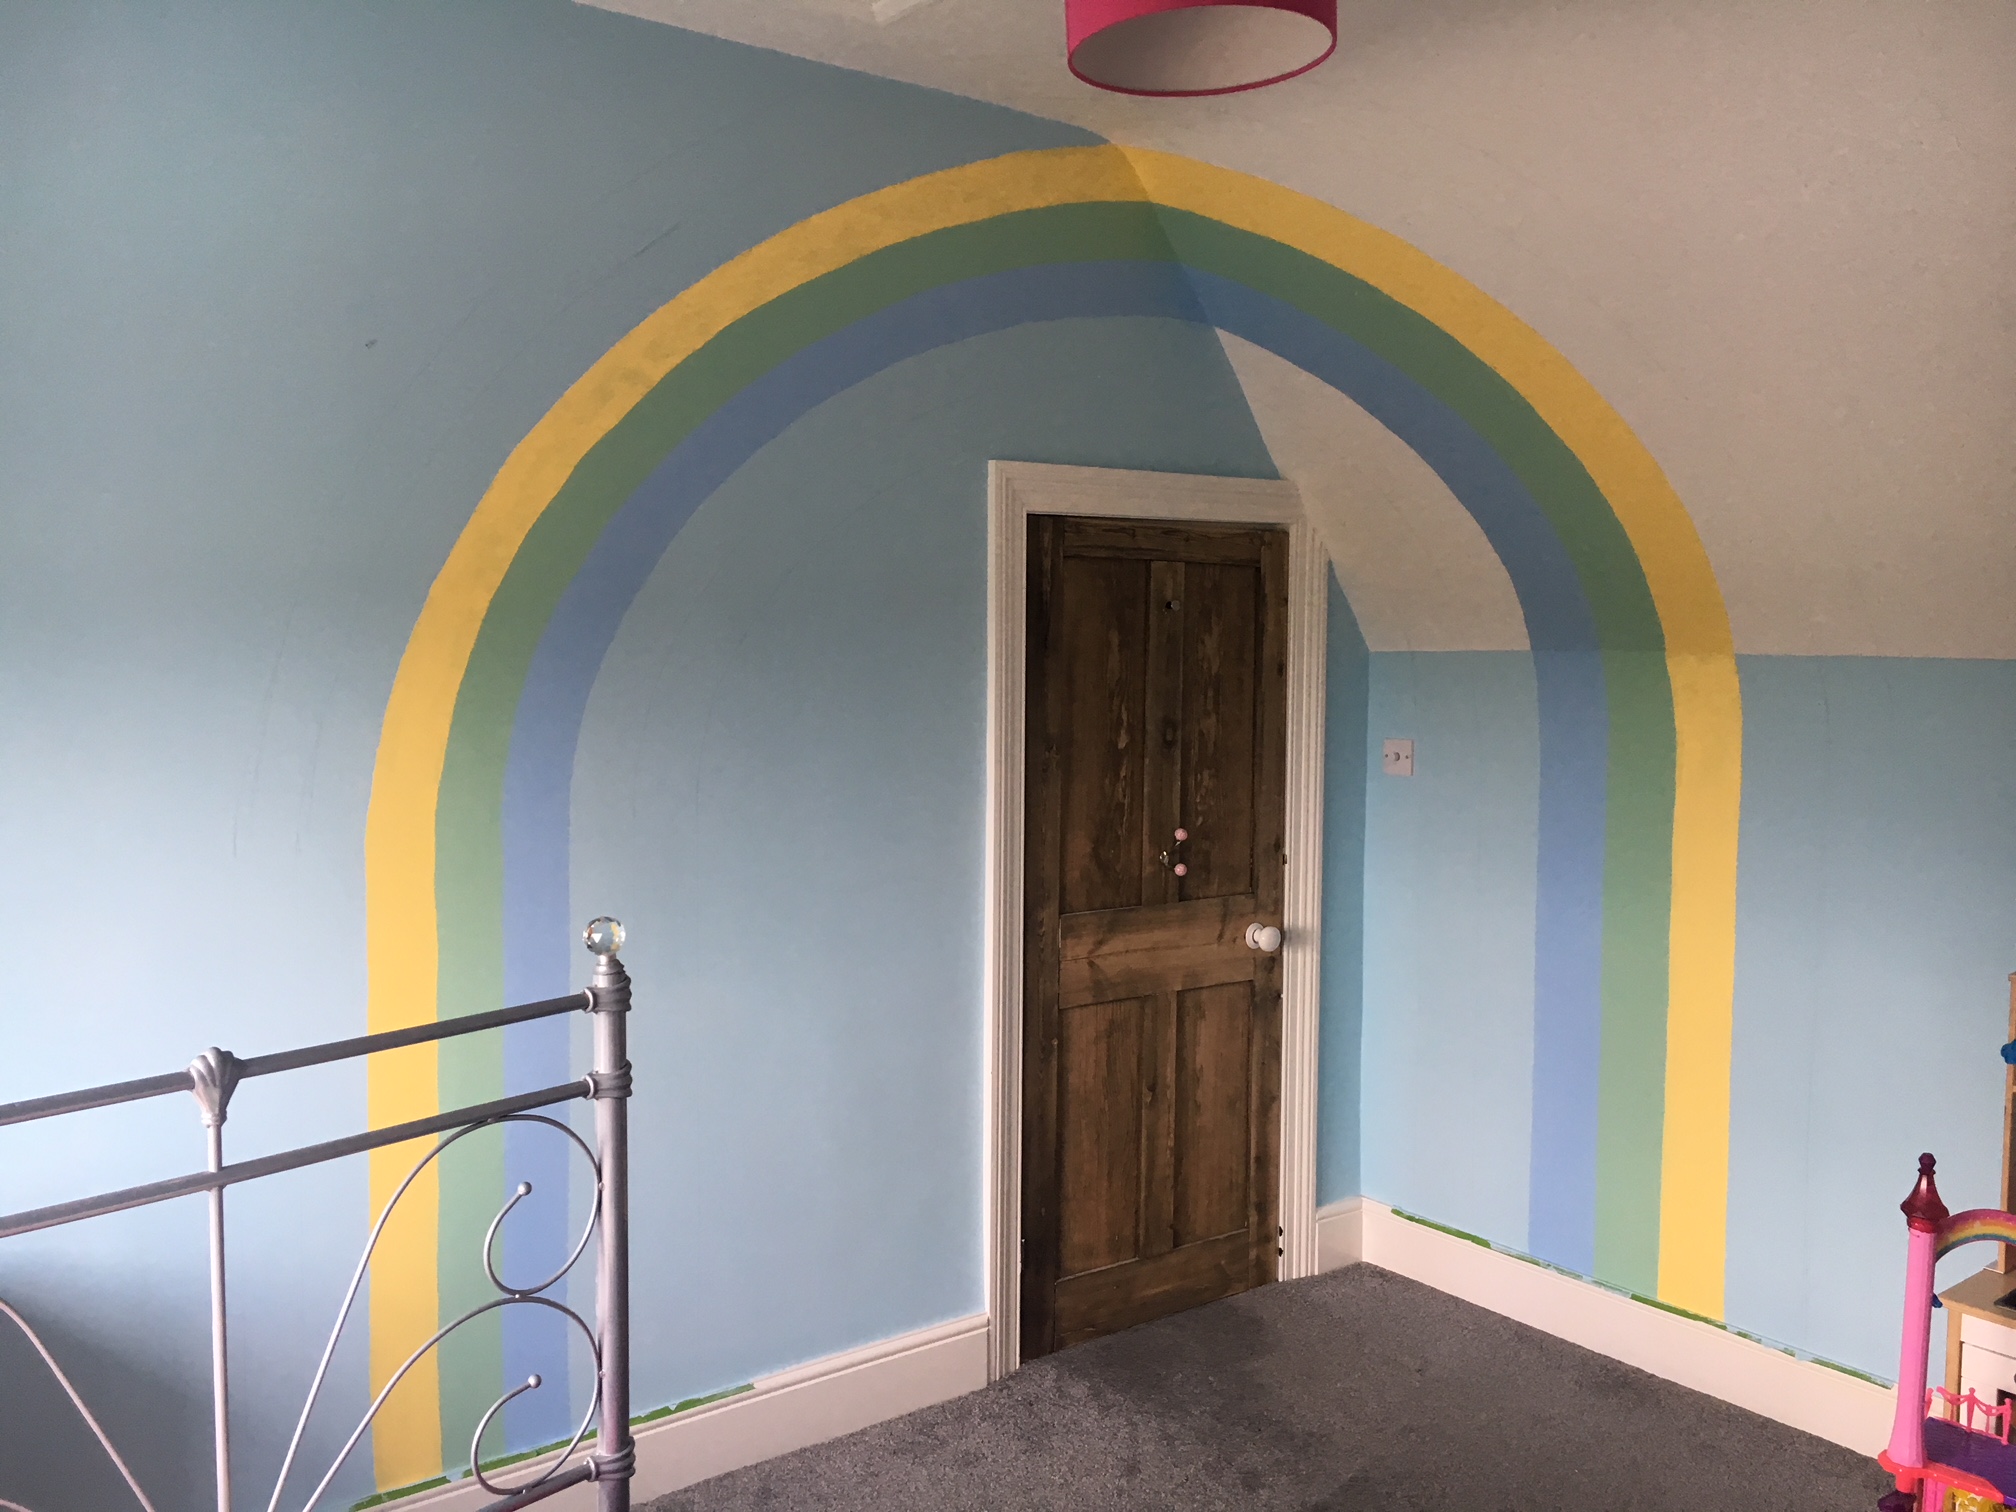
Frogtape won’t help you here – this is all on you. I started with green so that I could work my way out and do two colours at a time thereafter. You might find you need a few coats – especially of the paler colours – but you just need to remain slow and measured. I found myself holding my breath a lot to keep that curve going round in a steady line.
I must have said Richard Of York Gave Battle In Vain about a hundred times when I started the other colours. I had a real panic when I got to the right hand side because the yellow was to the right of the green, not to the left, until I realised it obviously arcs over.
 It also got more difficult the higher I got as I had to reach right above my head to paint on the ceiling and maintain a straight line at the same time. Made a few splodges where the wall met the ceiling until I got the hang of twisting the brush away as the surface angle changes. Listen, it’s just paint.
I got into a rhythm of painting a couple of layers each day and going over the previous stripes where needed so I was tidying as I went. Top tip – keep your paintbrushes wrapped tightly in a food bag or cling film to avoid having to wash them and wait for them to dry day-to-day if you know you’ll be doing touch-ups the next day.
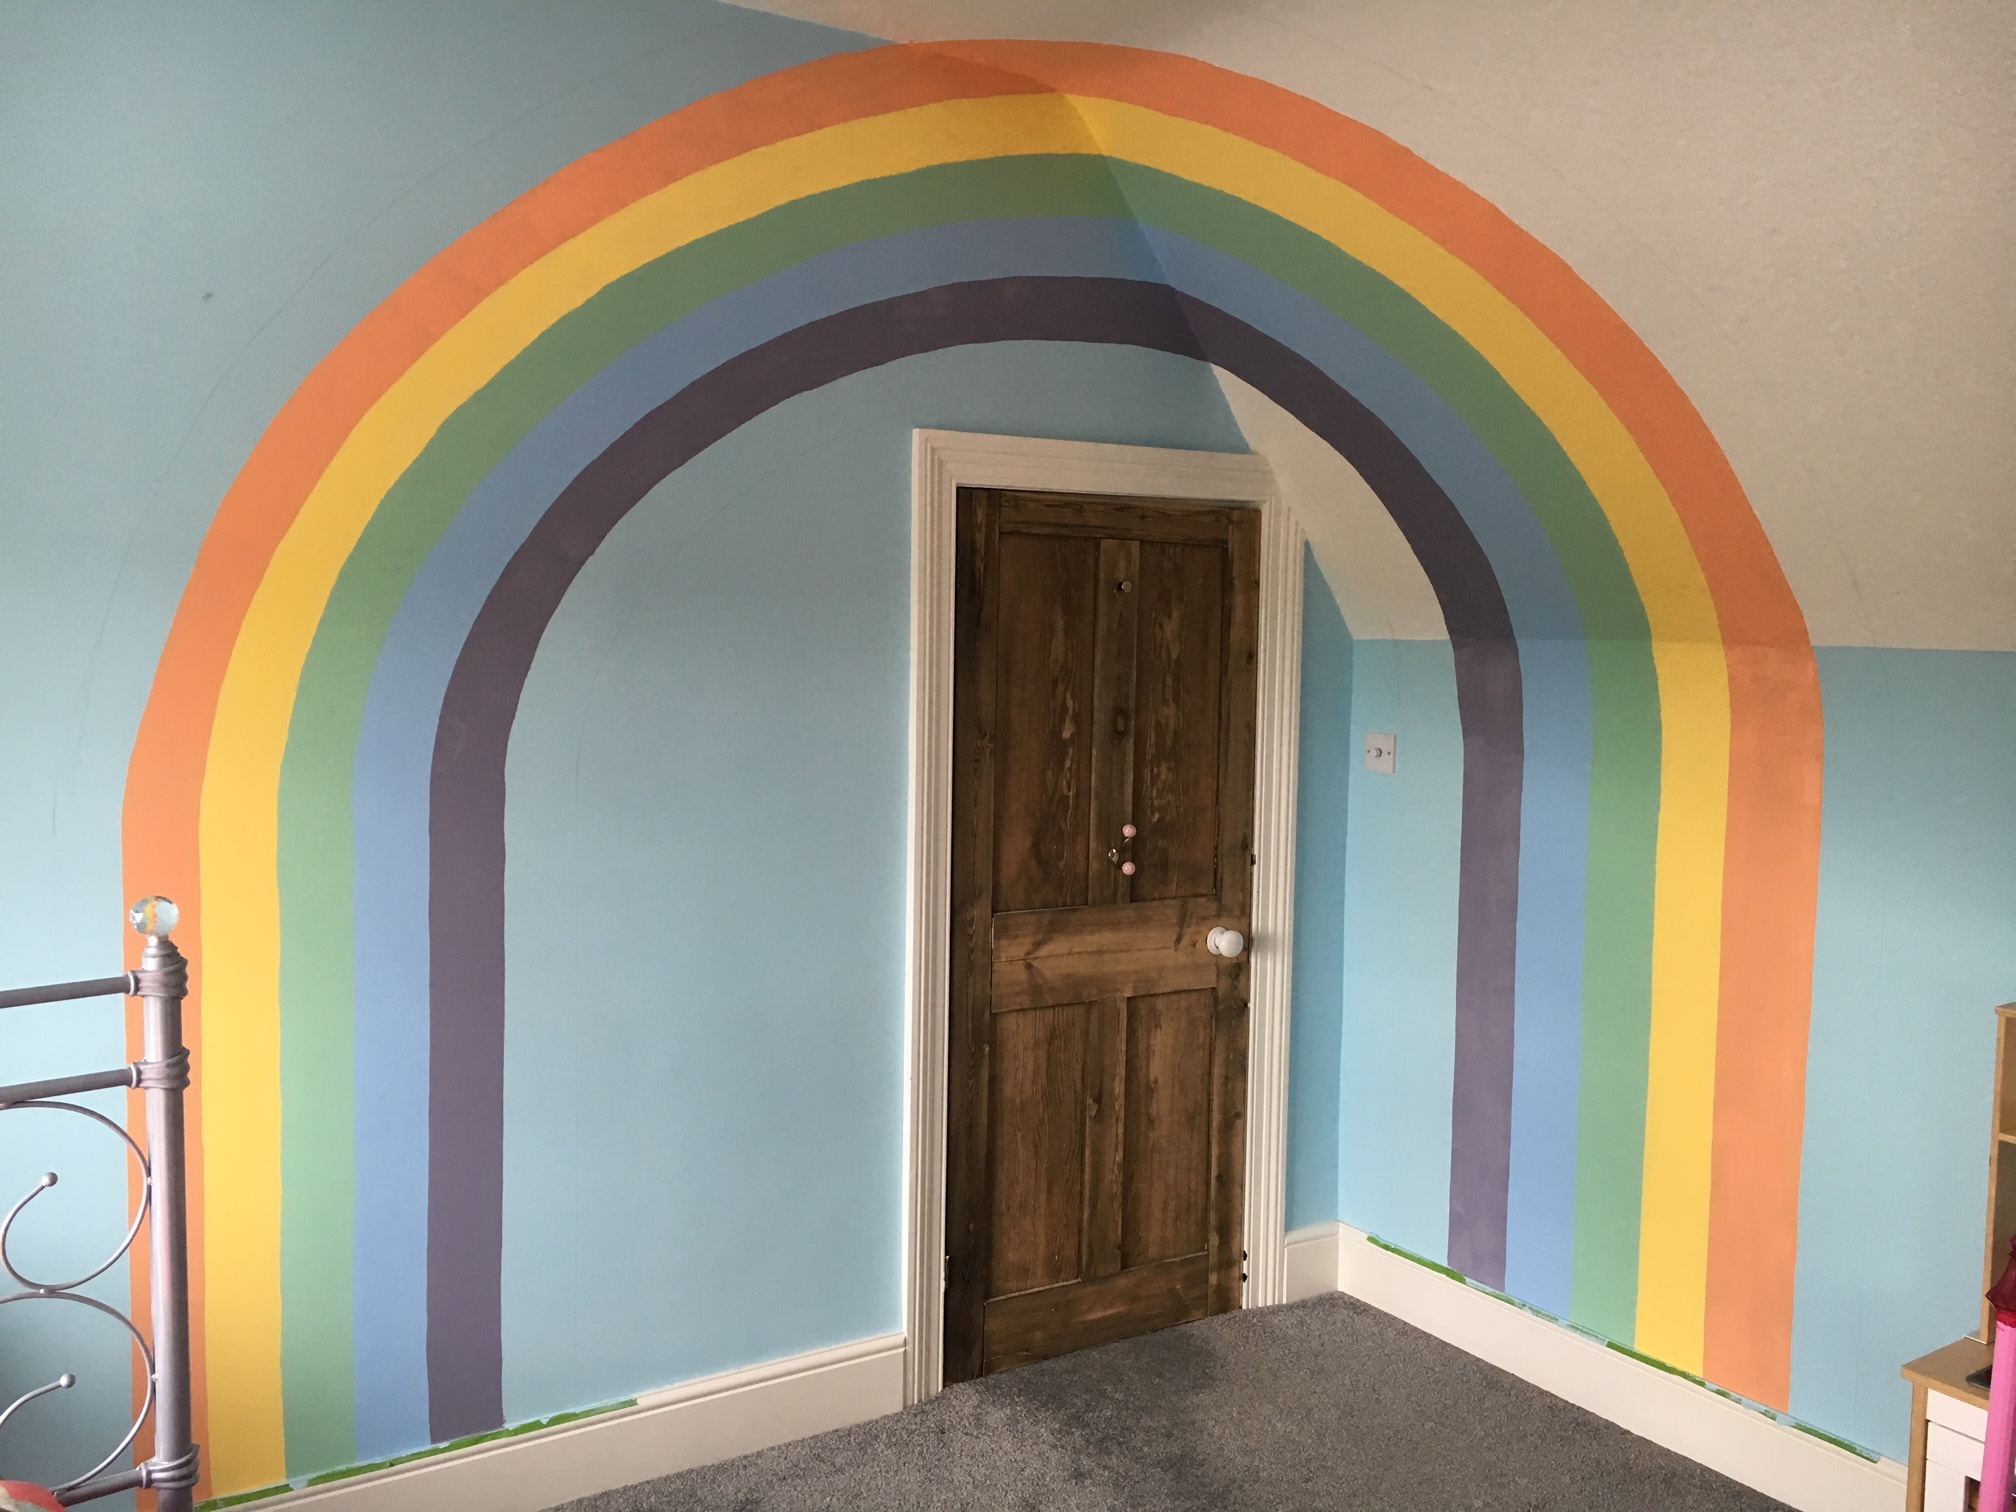
The finished rainbow

The layers you really need to worry about are the outer ones – these took the longest as I didn’t want to mess them up and have to start painting the ceiling white again, which would have taken quite a few layers against that red. But again. It is only paint.
Madonna helped here. I totally zoned out and took my time to try and get it as steady as I could.
The whole project took me 13 days from first paint samples to completion – the rainbow itself took just under a week because you have to wait for each layer to fully dry before doing the next layer. I was conscious that Scarlett was sleeping in this room still, and even though it’s water-based, I didn’t really want her inhaling fresh fumes every night, so I didn’t do any on my working days and staged it to let each layer dry earlier on in the day.
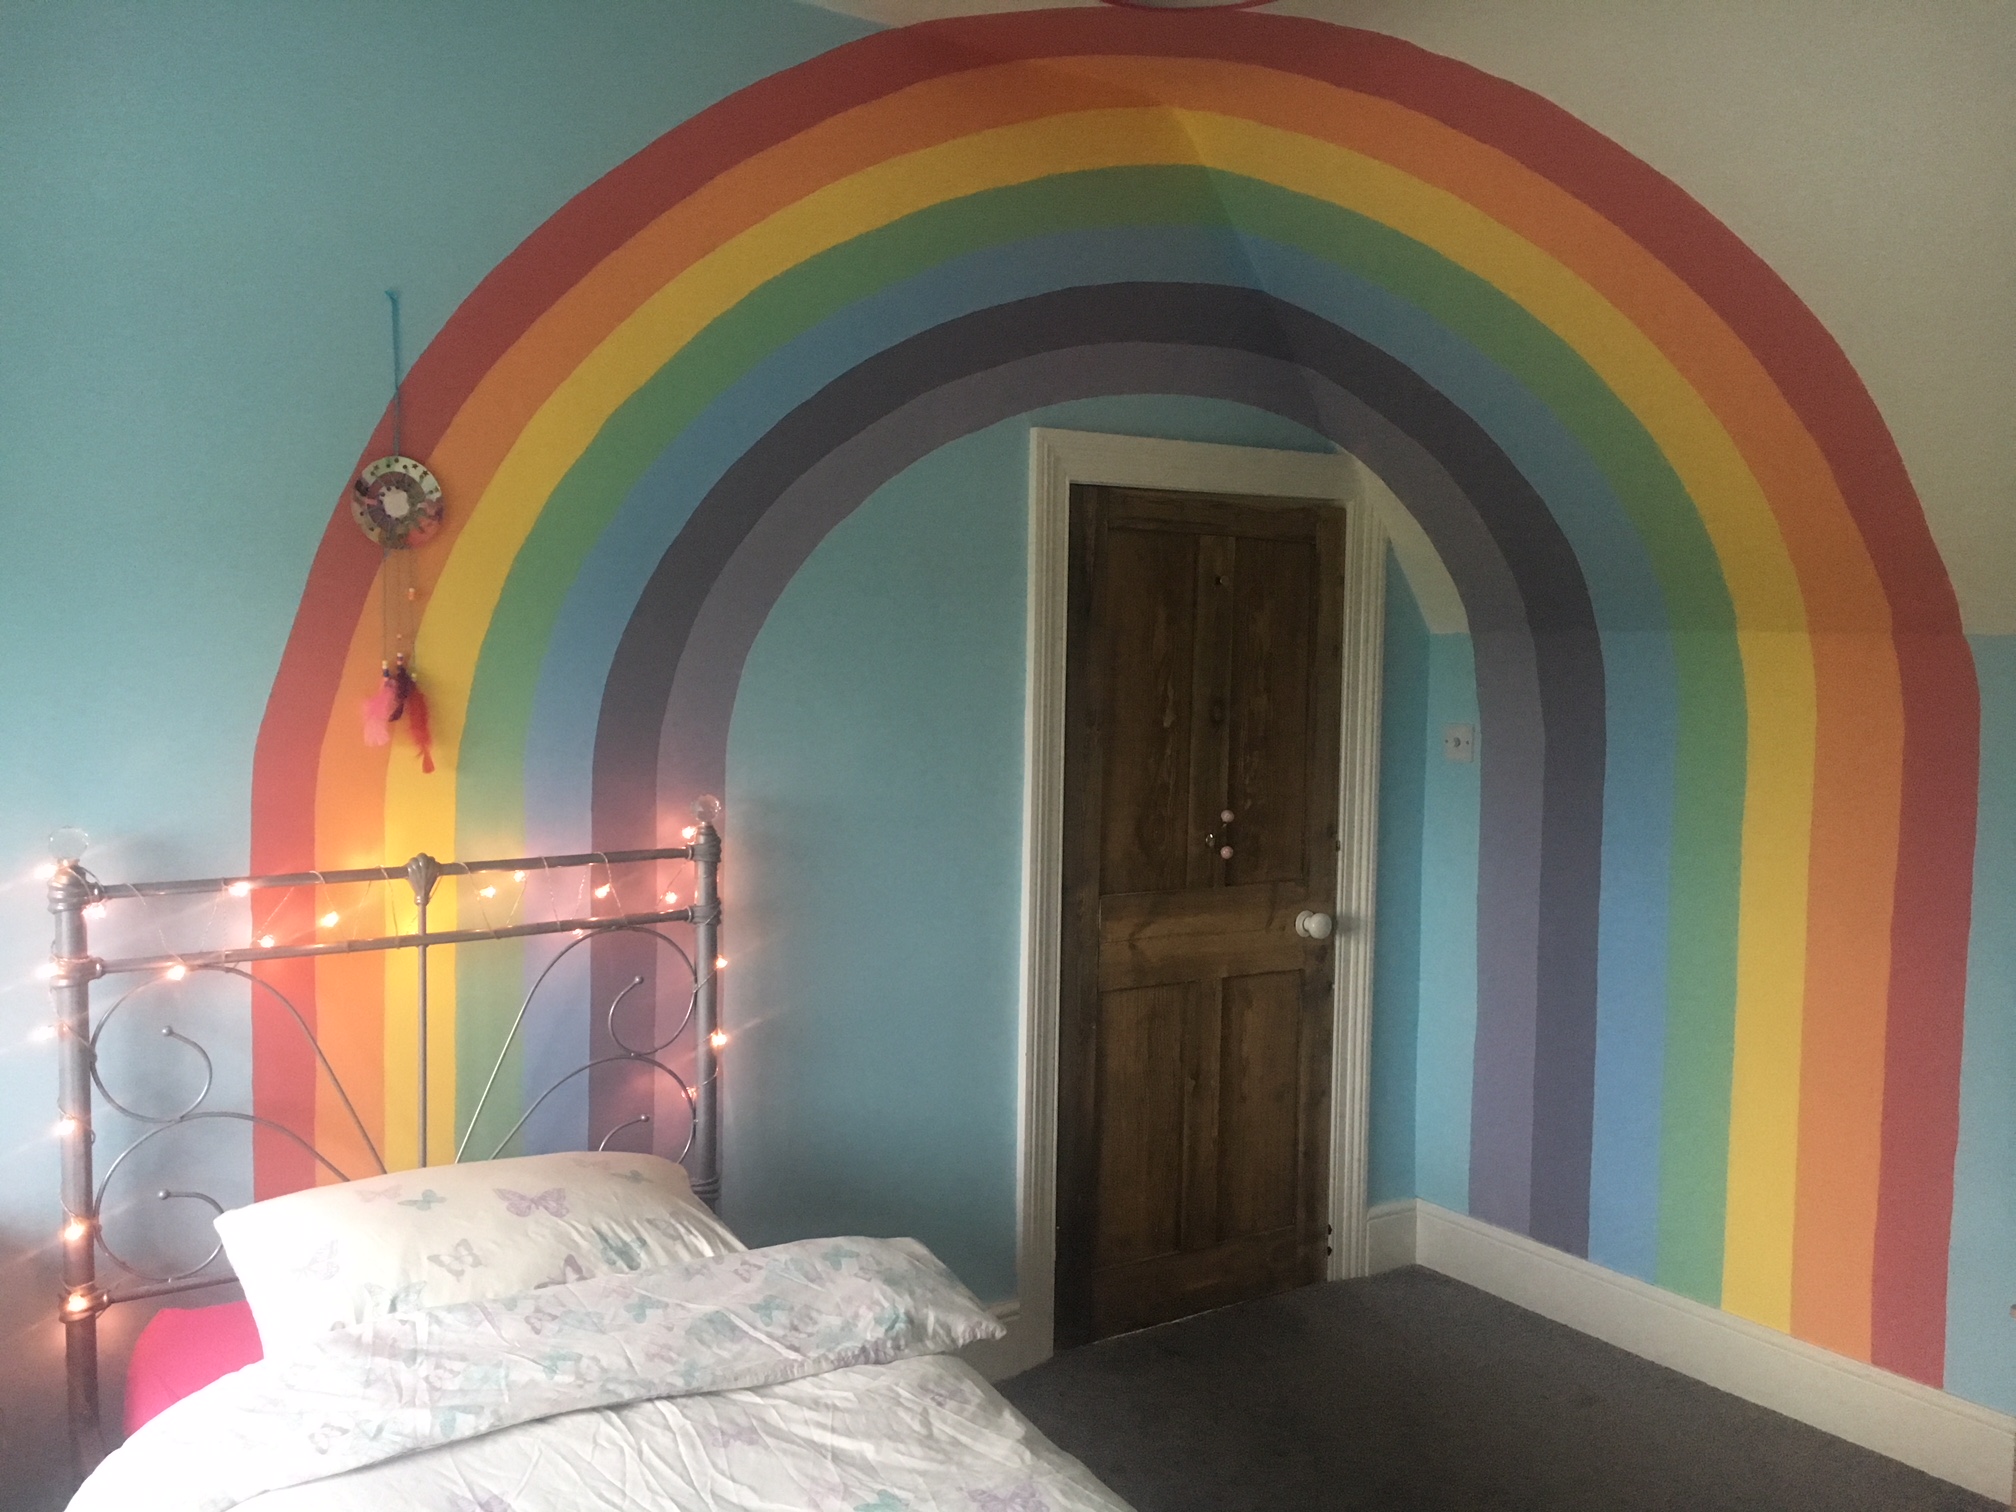 Et voilà. It’s pretty satisfying to step back and see this. It has to be noted that it only looks like a full arc from the opposite corner of the room where I’d placed the projector. If you’re directly underneath the ceiling and look up, it looks like a weird wobbly line… but then step back.
I’m already thinking about little rainbow items I can bring into the room to carry this theme on, and I’m trying not to think about eggshelling the skirting boards and windowsill for a week – I’m on a break and have another project I’d like to squeeze in first. Head over to Instagram if you want a sneak peek!

And Scarlett’s verdict? “I love it! It would just be even better if it had clouds at both ends.” If she thinks I’m painting anything over this, she would be incorrect. This rainbow is going nowhere till she’s at least 18.
One thought on “How to paint a rainbow over varying angles and curved surfaces”