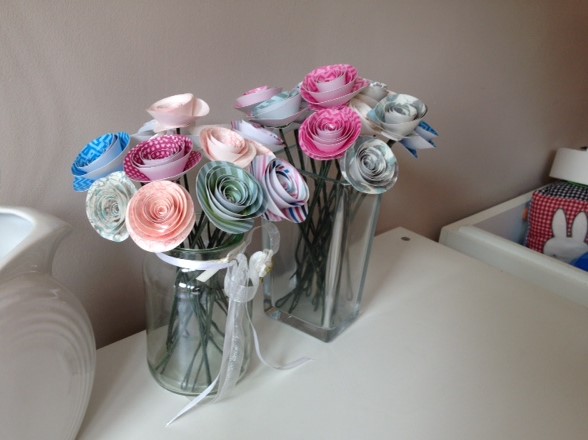
 A lot of my friends have very good taste, so when my friend Charlie mixed paper flowers in with real ones for the table at her wedding last year, it obviously looked great, whilst feeding her very real addiction to Etsy.
Tag: decorate

Polka dot cake: the reveal
I showed the preparation for Scarlett’s birthday cake in yesterday’s post. A week later, I defrosted the cake and the decorations were dry; a few broken, mostly because I’m clumsy.
Lenka suggested that I watch YouTube videos on icing a cake with ready rolled icing before I started it – this is what I really should have done before icing the Spiderman cake. That’s what I spent my lunch hour doing the day before I put it all together.
No idea what year this video was filmed, but this one with Pat Lock was the most useful one by far. I wrote myself a checklist of everything I had to do based mostly on this video!
I’ve put together a little gallery of the various stages – the photos explain better than I can! If you click on the first one, you can go through them in order (and captioned!).
-

- Spreading buttercream on the first layer…

-
- …and then jam. Bonne Maman, obviously.

-
- Rolling out the icing. String is on the left there – Pat’s tip!

-
- Covering the cake.

-
- This is the brilliant bit! The cake smoother gave such a professional finish!

-
- Then I poked pinholes through a polka dot template to mark where the polka dots would go.

-
- Decorating the cake with polka dots.


-
- Ta-da! You can see Scarlett’s little hand, I had to speed up at this point!

-
- Here’s my better bird…

-
- …and the one that looks like a duck.

-
- The final product.


-
- And our tea party spread!

What a lovely day, and the cake was enjoyed by all of us at the tea party, we took some to nursery and I took some to work. Now to buy a cake smoother…
Polka dot cake

What a year it’s been! To celebrate my daughter, Scarlett, turning a whole one year old, I thought I might make a cake for her birthday tea party. Fine. Then I started looking to Pinterest for a little inspiration. This is where it all blew up, because there are some AWESOME cakes out there! Up to now, my nephew’s Spiderman cake of ’12 was by far the best cake I’d made, and I really, really did not know what I was doing. Yeah, I can bake a cake, but I really have little clue when it comes to icing and decorating.

I drew out the little doodle above after all of my Pinterest madness. My bird actually ended up looking pretty much exactly like this! Yes, it looks a bit like a duck. As well as all the amazing cakes, I was inspired by the polka dot birds hanging in her room.
Luckily for me, I have a bona fide cake expert in my friend Lenka, who creates beautiful and yummy delights (check out her facebook page!) – she made Scarlett’s Christening cake. She repeatedly set me on the right track.
A week before Scarlett’s birthday, Lenka dropped into conversation that I needed to be making the decorations for the cake so that they’d dry in time. Cue panic stations! To combat said panic, Lenka provided me with:
- 2 x 12″ cake tins
- 2 sets of letters to spell out Scarlett
- The number 1
- The top of a piping bag to stamp out polka dots
- A cake smoother. I’ll get to this, it’s BRILLIANT!
So, if Lenka hadn’t been involved, I would have pretty much had a plain cake, with whatever Tesco’s Dr Oetker display had to offer thrown at it.
 A week before the big day, I baked four cakes. Yes, you read that right. I had a dream of a graduating pink creation. We’ll brush straight past that one, because it didn’t work. I didn’t put enough food colouring in. I then stacked the cakes in colour order (I was still crossing my fingers at that point) and froze them. With Barry’s family coming to stay, I thought I wouldn’t have time to bake, ice, and decorate a cake as well as clean, etc.
The following day, I started making the decorations in two shades of pink. Here are the polka dots, along with birds, letters, numbers and I iced the cake board for good measure.
 For the birds, I drew around the ones in her room onto greaseproof paper and cut them out to draw around. I made so many decorations because I thought some may crack and break, which they did. I do wish I’d had a bit more patience with the letter R, because it was very stubborn and ended up looking, erm, full of character. My friend Jemima said I’m not allowed to say it was crap.
I then waited a week to put it all together, but I won’t make you wait that long…
My shameful secret
I may get lambasted for this by the pro-craft crowd, but I’m a bit embarrassed to admit… my name’s Michelle and I like to cross-stitch. Lambasted for the embarrassment, not for the sewing itself. I’m not getting any time to do it at the moment, but I started a baby sampler for Scarlett’s room before she was born and I am going to try my best to finish it soon. Before she’s five. Definitely before she’s ten. Would it be a nice graduation present?
I love doing little bits as gifts for people, I’ve only ever had them gratefully received as I think you can see the time, work and care that goes into them. I’ve sewn cards, bookmarks, and framed pictures, small and large. I’ve made quite a few birth samplers, including one that I started when I was about fourteen or fifteen and took me years to complete. It was around A3 sized and a lot of it was a deep blue – I remember clearly taking care over every stitch. Couldn’t wait to start another colour.
Nursery wall
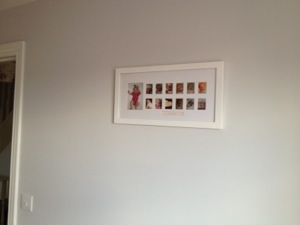
I’ve finally got rid of my heinous work of art, and I’ve put up a photo frame that my lovely brother- and sister-in-law got Scarlett when she was born. It’s got 12 photos of her, so I’ll replace them when she’s a year old so that there’s one from each month. It’s a lovely idea!
It’s a bit smaller than the car crash “artwork”, so we’re going to put some little hooks around or under it and hang some hearts on them to use the space a little better.
I found these polka dot bird hooks on eBay and fell in love with them (I’m finding I have more success buying than selling on eBay at the minute), I thought they look very sweet!
I’ve had this hand and footprint done since Scarlett was five weeks old, and it’s just been sat on her windowsill since then – I can’t wait to put it up on the wall!


Branas, I’ve been expecting you
 You may recall that we have an Ikea Expedit unit in our lounge, and back in… ooh, February, erm, 2012, I expressed a desire to pop some little white baskets in those gaps. Those little white baskets cost £15 each, and as we wanted to fill 10 of the holes (the bottom two rows), that’s a hefty trip to Ikea without all the random napkins I pick up on the way round. And the meatballs, of course.
Well, we’ve been forced into buying something for them, mostly because our five month old has just started rolling and I swear she was eyeing up those DVDs.
Our first stop was musicmagpie.co.uk, which is one of those sites that buy your stuff for next to nothing and undoubtedly sell it on for a huge profit. I couldn’t be bothered to eBay all the stuff, with all the Post Office faff and my track record in buyers (I had another one recently with a dress I sold to a person who clearly can’t read), so I downloaded the app onto my phone and zapped the CDs and DVDs with the barcode scanner. That was fun for a bit, but it gets a bit depressing getting £0.21 for your childhood. We’ve also kept really random ones (we couldn’t possibly give everything away), so I couldn’t sell Alanis Morisette’s Jagged Little Pill as I clearly remember buying it with my own money, nor could I allow Barry to pimp Con Air. He’s kept Bad Boys I and II (naturally) and Ghostbusters, but wasn’t bothered about any of his CDs.
In the end, we sold 185 items for £61.07. Don’t work out the average, it’s so depressing it’s unreal. The most we got for an item sold was £3.00 for a series of Friends. Sob!

Anyway, off we popped to Ikea, but those eagle eyes among you will have noticed that £60 will not 10 baskets buy. We’ve ended up buying two lovely baskets, and the rest cheap white cloth boxes, a veritable bargain at £2.50 each. I think they’ll get dirty fairly quickly, but they’re a good placeholder for more baskets or drawers later down the line.
Decking day deux
 We’re pretty much done with the decking already! The men started early, about 7.30, and started putting the decking boards onto the frame they’d built the day before. They also built the path back up so we didn’t fall into a deep, dark hole taking the bin out. That would have been inconvenient.
The skip that was supposed to arrive between 10am and 12pm came at around 5pm after the gents had already gone home, so they’re coming back on Saturday morning to get rid of the mound of dirt in the back garden. I did try to shame the man delivering the skip but he just asked us for money. We didn’t give him it.
 The landscape guys also built a raised flowerbed at the bottom of the garden, as per Barry’s masterplan, which looks great; we just need to decide what to put in it.
After the mud has been cleared away, we need to get some grass seed stat and dig up those nasty weeds that blight our grass.

We’re also planning on getting a new shed, putting a step in between the two levels for Scarlett’s tiny legs and covering the manhole cover in some way. Then we would like to put up higher fence panels next to the decking, as we can currently see right over into next door’s garden now, and that’s just not polite. Then we’re going to stain the decking and fence so everything matches. I quite like the idea of it being a dark stain, but we’ll have to go shopping and see.
Then we need some nice garden furniture and Barry’s loving the idea of a fire pit.
After that (but way in the future), I’d like to change the paving slabs we have for nice ones instead of the utilitarian grey concrete ones that the house builders put in. We’ll need almost 40, so it won’t be cheap!
I’ll put up some more photos once the mud mound has disappeared, but I’m really happy with this result! Just hope we get a summer to go with it…
So, what do you think? Quick poll: have you ever painted one side of your fence (and not the neighbour’s side)?
A deck above
 Day one of the decking – the frame is in, hurray! I wasn’t sure the poor men would come this morning because it was raining so hard, but turn up they did, and worked through until the sun shone later this afternoon.
I took a couple of surreptitious photos when they nipped back to the van (I thought they might feel judged if I did it while they were working!), hence the photos through the door.
They dug out a lot of mud and rubble, much more than they’d thought initially (a skip is winging its way to us tomorrow).
 Then they started on the two-level frame. Because it was raining so hard, the grass section of our garden is now a muddy mess, but never mind! It wasn’t exactly manicured beforehand, but hopefully we can sort it out for summer. If it ever comes.
One of the paving slabs next to the decking is now about to collapse, so it needs building back up underneath, which apparently they’ll do tomorrow, along with putting the boards on presumably, but don’t know how long that takes.


Deck ahoy!
I’m a terrible blogger at the moment, my little baby is taking all my time, but I don’t mind! We’ve added a couple of bits to the nursery which I need to photograph, and in the meantime, Barry’s organised someone to do the decking! Finally!
I mentioned the decking plans back in June, and the same plans apply, only instead of Barry doing it, we have a man who can. It turns out that he was £100 more than if we just bought the bits ourselves, and that is £100 well spent. The gentleman is coming for two days this week, and then we can laze in the summer mizzle.
 This is the view from our back door at the moment, kind of uninspiring. The dandelions are the only flash of colour. Barry tore the shed down this weekend – the bits are being collected for firewood and the paving slabs keeping it straight have gone on (what else?) eBay!
We’re having decking down the right hand side, extending the patio to the left, and keeping some grass. I want to change the drab paving slabs for something nicer, but that may have to wait. The fence also needs to be a bit higher on the right hand side, otherwise we’d be sunbathing looking over at our neighbours below us, a little intrusive! We’re also going to stain everything dark.
I think – I hope – everything is going to look fabulous!
Stool

Well, the baby hasn’t arrived yet (only a week and a half to go to due date!). In the meantime, I’ve been finishing off the upholstery side of the rocking stool that came with our nursing chair from my lovely friend Helen. All it needed was a staple gun!
The edges aren’t the most professional, mostly because I don’t have a clue what I’m doing, but definitely fit for our purposes.

All we need to do now is wait for the weather to brighten up a bit (more snow due this week, folks!), and then set about painting the wood white – I think it really would make it.